Category Archives: Tags

Everything’s coming up roses

Happy February! I’m enjoying all things Valentine at the moment and pulled out a delightful rose image from Wendy Vecchi and Stampers Anonymous to work with for a Valentine tag. I’ll share a few of my steps here, and you will see that this came together quite simply.

I began by stamping the rose image from the Stampers Anonymous SCS175, “Rosy Art” set by Wendy Vecchi Studio 490 onto plain white cardstock. This set has a really cute picnic basket and nice sentiments as well, but I decided to use just the flowers for the real estate I had to work with on the tag I’d chosen.

The really cool thing about this stamp set (and a number of others designed by Wendy) is that it comes with stencils! So you can add color to areas of your image easily while blocking out other areas. This set also has a mask that can be used to cover the roses, which means you can add color to the leaves without giving your flowers an inadvertent green cast!

I used Ranger Archival inks in Rosey Posey (appropriate!) and Red Geranium to blend color onto the roses with blender brushes. Post-it Notes are kind of requirement for me, which covered the open areas of the stencil if I got overly zealous with my blending. I didn’t photograph it, but I moved onto the leaves after this and used Fern Green and Prickly Pear Archival inks to color all of the leaves, also using the stencil. I filled in the area between flowers with Copic markers (E01 and E02) so it wasn’t stark white.

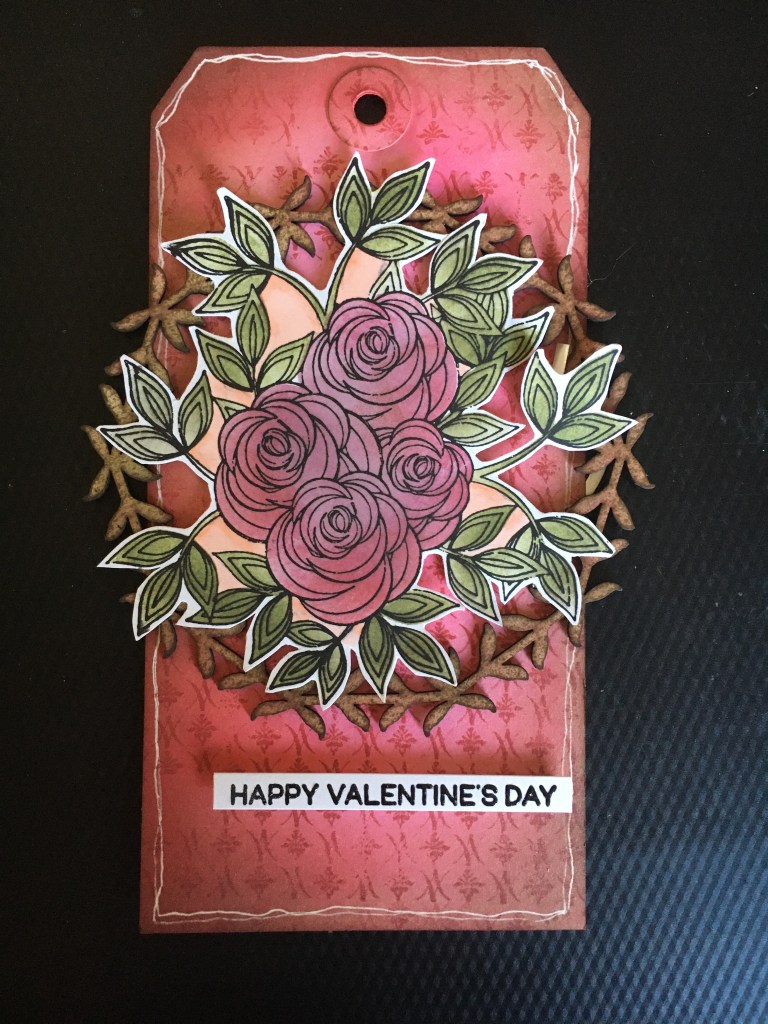
I had a tag in my stash that had a background already done using Red Geranium Archival ink and alcohol. I try to do a number of backgrounds at once, so I can just grab one when I’m ready to make a card or tag. If you’d like to know more about this background technique, Wendy Vecchi has a number of tutorials and wonderful classes that cover it and I highly recommend you check them out if you haven’t. With the color down, I stamped the Stampers Anonymous Vintage Tapestry background stamp onto it, also with Red Geranium for a bit of tone-on-tone. I then blended Acorn Archival onto the edges to give a more aged, vintage look.

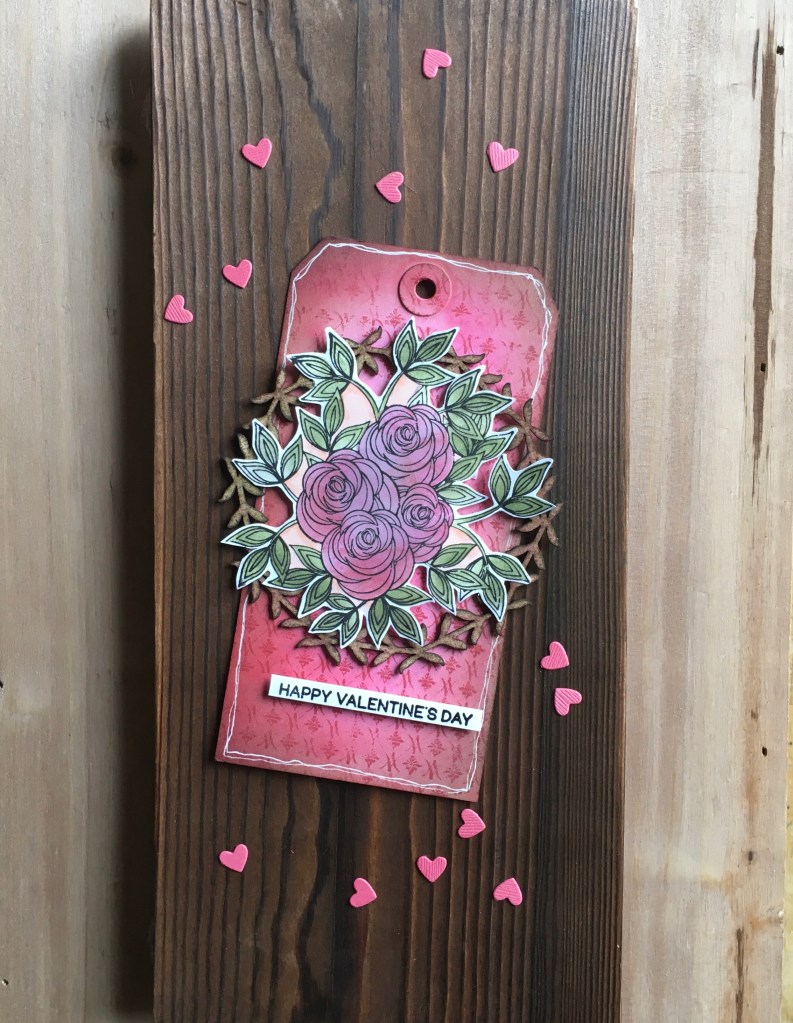
I placed the trimmed out, colored rose image onto a chipboard wreath (Ranger Ink Chippies: Wreathes) for some dimension. Here you can see that I applied Acorn archival ink to the wreath to pick up on the aged look of the tag. To finish the tag, I doodled a white border onto the tag with a white gel pen, hoping to visually pull it together since the flowers have a white border. I popped up the roses and wreath on the tag with foam tape and also popped up sentiment (from Everyday Sentiment Strips by Hero Arts).

And there you have the finished tag. Please let me know if you have any questions. As you most likely know, you can also find me on Instagram and Facebook @penguiinpapers

To learn more techniques by Wendy Vecchi, join her Facebook group: INK…STAMP & MAKE ART with Wendy Vecchi and follow her on Instagram @wendyvecchi . She adds new content frequently.


Snow globe greetings

  • Stamp – Lawn Fawn Offset Sayings: Christmas
  • Dies – Lawn Fawn Snow Globe Gift Tag and Mini Snowflakes
  • Patterned papers – Lawn Fawn
    • Peace Joy Love collection: Rudolph
    • Snow Day collection: Chunky Scarf
  • Glitter paper – Lawn Fawn Pixie Dust and Gold Rush
  • Red cardstock – Bazzill
  • Ribbon
  • White embossing powder

I really like this snow globe die set from Lawn Fawn! You can make adorable gift tags with it, but I had fun using the globe as a focal point on this simple card front. For the layout of this card, I used a sketch featured in CAS(E) this Sketch #350 challenge. I combined two small prints on the patterned papers for a little spice and tied a ribbon through the tag to keep it authentic. Thanks for stopping by.


Snowy Holiday Tag

  • Stamp (snowman) – Stampers Anonymous/Tim Holtz – Mini Blueprints – CMS 136
  • Patterned paper – Authentique – Nostalgia Three
  • Dies –
    • Simon Says Stamp – Melody Snowflake
    • Lawn Fawn – Mini Snowflakes
  • Ephemera – Tim Holtz Idea-ology Ephemera Pack – Festive
  • Chipboard Quote Chip (Joy) – Tim Holtz Idea-ology – Christmas Words and Phrases
  • Candy Cane Chipboard – Echo Park Decorative Brads & Chipboard – Twas the Night Before Christmas
  • Mini Snowflake Ornament – Darice
  • Wooden Christmas Tree – Sierra Pacific Crafts
  • Ribbon and Ric-Rac

This is one of my favorite kinds of projects: creating a tag and combining a lot of different products from a lot of different companies! I created this tag for an exchange with my online cardmaking group. It also fit perfectly with a color challenge at The Paper Players. I started out by covering a plain manila tag with the patterned paper. I stamped out the snowman and colored the background on the image with some Evergreen Bough Distress Ink and used some of my Posca pens to color details on the snowman and to make the snow. I edged most of the elements with Medieval Blue Versafine Clair ink and then fit the die-cut snowflakes and all of the other little pieces together to form my composition. I edged the tag in blue ink as well and then tied the ribbon and ric-rac through the tag’s hole and attached the little snowflake ornament. This was really fun to make and I popped it in the mail to the recipient today. Thanks for visiting.

Challenge: The Paper Players Colour Challenge #422


Mixed Media Tags 2018

  • Prima Marketing silicone mould: Vintage Art Decor “Trifles”
  • Prima Marketing Paper Clay
  • Prima Art Alchemy Acrylic Paint: Mermaid Sparkle and Metallique Deep Waters
  • Stencils: Stampers Anonymous/Tim Holtz – “String” and “Houndstooth”
  • Texture Paste – Finnabair Art Basics Light Paste Opaque Matte
  • Ranger Distress Inks
  • Handmade (by me) collage tissue
  • Tissue wrap – Tim Holtz Ideaology “Postale”
  • Sequins

I created this pair of tags by layering papers, paint and ink and then topping them off with a painted piece that I molded from paper clay. I began by adhering some collage tissue and Tim Holtz patterned tissue wrap. I applied Distress Inks and then added some texture paste through a stencil. I painted the paper clay pieces with metallic paints and adhered them, along with the sequins. I inked the edges of the tags and tied some ribbon at the top of each.

For a closer look, here are some additional photos.


Thanks for stopping by.

Challeges:

Simon Says Stamp Wednesday Challenge: Anything Goes

The Vintage Journey: Tag Friday Special


Authentique Bird Mixed Media Tag

  • Patterned papers – Authentique “Refreshed Collection: Refreshed Four” and “Refreshed Collection: Refreshed Six”
  • Die – My Favorite Things “Stitched Tags”
  • Tea Bag
  • Stencil – Dina Wakley Media “Plastic Canvas”
  • Acrylic paint – Dina Wakley Media “Blushing”
  • Scribble Stick – Dina Wakley Media “Ruby”
  • Washi tape – Dina Wakley Media
  • Twine

I created this mixed media tag for a class I taught. I really enjoyed putting it together with a variety of materials and knowing that combining these materials would be something new for some of the students. I began with a die-cut tag from raindrop patterned paper. Layers include some stenciled acrylic paint, washi tape, and tea bag paper beneath the fussy-cut bird from Autentique paper. Thanks for visiting.

Challenge – The Crafter’s Cafe Challenge #194- All Creatures Great and Small


Mixed Media Layered Butterfly Tags


  • Dies –
    • Sizzix Tim Holtz Detailed Butterfly Thinlit dies
    • Sizzix Tim Holtz Tag Collection Framelit dies
  • Stencils – Stampers Anonymous Tim Holtz Layering Stencils: Diamonds (THS081), Flourish (THS032)
  • Stampers Anonymous Tim Holtz Idea-ology Tissue Wrap – Postale
  • Ranger Texture Paste
  • Dictionary paper
  • Napkin – Michel Design Works “Wisteria” cocktail napkin
  • Ornate metal corners
  • Distress Oxide inks – Broken China, Cracked Pistachio, Faded Jeans, Worn Lipstick, and Black Soot
  • Ranger Perfect Pearls mist – Bronze
  • Ribbon

I worked on these tags over quite an extensive period of time: layering, drying, analyzing… They were a lot of fun to make though. I cut the tags from a Tim Holtz die set that I’ve had for years and comes in handy because I can make lots of different sizes with it. I made backgrounds on the larger two tags using Distress Oxide inks in blues. Then I added torn butterflies from the napkin applying them with gel medium.

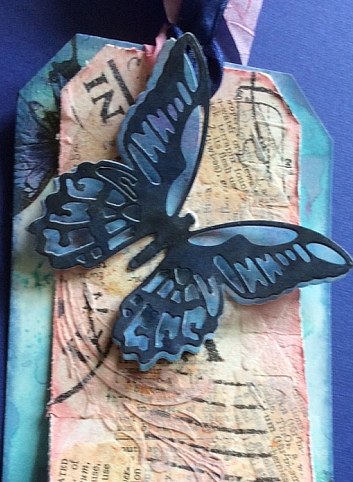
Because I was layering the tag pairs, I added more details on the smaller ones as they would be most visible. I started by collaging torn dictionary paper and Tim Holtz tissue wrap with gel medium onto the gessoed tag surface. I then applied texture paste through stencils. Once that was dry, I layered Distress Oxide ink (Worn Lipstick) over the top and distressed the edges of the small tags with the Tonic Studios paper distressing tool. I added some spritzes of Perfect Pearls mist to add some sheen.

I used more Distress Inks for the butterfly layers, the base layer in blues and Worn Lipstick and the top layer with Black Soot. I then die-cut the black layer and placed it over the base layer so just the center of the body was attached and the wings stick up. I colored the white ribbon with distress ink for a perfect match and tied the two tags together.

Thanks for visiting. It was fun investing time and experimentation into these tags!

Challenge: Happy Little Stampers November Mixed Media Challenge: Tags


Daisy Tag

Daisy-Tag-Distress

  • Dies – Simon Says Stamp “Stitched Daisies”
  • Stencil – Ranger Dylusions “Fronds of  Foliage”
  • Tag – Ranger #8 Manila Tag
  • Distress Crayons – Ranger Tim Holtz: Chipped Sapphire, Seedless Preserves, and Mermaid Lagoon
  • Distress Inks – Ranger Tim Holtz: Chipped Sapphire and Salty Ocean
  • Cardstock – Bazzill
  • Ribbon

This tag was my first experiment with Distress Crayons. I started with a manila tag and colored it with three different colors of the crayons, pretty much covering the whole tag. I spritzed it with water and blended the colors a bit. I applied Chipped Sapphire Distress Ink through the stencil in a few spots and then applied Salty Ocean ink all around the edges of the tag, blending all of the colors together. Along the way, I spritzed and splattered some water to add some nice spots! The focal point is the set of daisy die cuts from Simon Says Stamp, that I also distressed with Chipped Sapphire before adhering to the tag. I like how the ink picks up the faux stitching on the daisies. Thanks for visiting today.


TCP Tuesday Challenge #278 – Penguin Tag

catspj-penguin_tag

  • Stamp – The Cat’s Pajamas from the “Polar Holiday” set
  • Tag – Die cut from Simon Says Stamp die “Medium Tags”
  • Snowflake – Impression Obsession “Snowflakes” die
  • Patterned papers – GCD Studios “Joyful Peace Collection: Candy Lane, Yorkshire Pudding and The Holly and the Ivy”
  • Twine – The Cat’s Pajamas “Divine Twine: Peppermint”
  • Wink of Stella Brush
  • Ranger Distress Ink – Walnut Stain

For this card, I used the sketch at The Cat’s Pajamas TCP Tuesday #278 Challenge. This cute little dapper penguin is from The Cat’s Pajamas. I applied Distress Ink to the edges of the tag to match it to the patterned papers. I painted the snowflake behind the tag with the Wink of Stella brush pen for some nice shimmer. This also fits the bill for the current challenge at Addicted to CAS Challenge #51 – Code Word: Tag. Thanks for visiting.


Halloween Kitty Tag = Spooky!

spooky-tag-1

  • Stamp – Inkadinkado “Black Cat”
  • Dies – Sizzix Tim Holtz Alterations “Tag Collection”
  • Patterned papers – My Mind’s Eye “Frightful Collection: Spooky” (both sides)
  • Epoxy Sticker – K&Company – Brenda Walton “Haunted Clearlly Yours”
  • Ranger Distress Inks: Spiced Marmalade, Fired Brick, Black Soot
  • Cardstock – Bazzill
  • Ribbon – May Arts
  • Perfect Pearls Mist – Biscotti

Today I present you with a spooky Halloween cat with some sparkles for good measure. I created this for the challenge at Friday Mashup (Friday Mashup 181) which was to create a card with a tag, or one with bling, or one that featured both. Well, this fit the requirements for both. The patterned paper had lots of sparkle (not sure how clear that is to see in the photo) and I created a cat tag, distressing the background with Ranger Distress Inks. I also spritzed the whole card with Perfect Pearls Mist for some additional bling. The whole card is quite spooky in my opinion!

Here’s a closer look:


spooky-tag-2


Thanks for stopping by today.


Inlaid Snowflake Tag Card

Inlaid_Snowflakes_Tag

  • Dies
    • Snowflake – Lawn Fawn Stitched Snowflakes”
    • Joy – Penny Black “Love & Joy”
    • Tag – Sizzix Tim Holtz Alterations “Tag Collection”
  • Patterned papers – Lawn Fawn “Wool Socks” (both sides)
  • Cardstock – BoBunny “Strawberry Double Dot”
  • Bling – Mark Richards “Silver Metal”
  • Ribbon – May Arts “Solid Wrinkled” in white

I love this sketch from Retro Sketches (#13). This week’s Retro Sketches Challenge is a Wild Card, which means I can use any sketch from Retro Sketches for my card. I decided to try my hand at inlaid die cuts for this tag card. I cut the snowflakes from white cardstock and then inlaid them into die cuts in the tag so that the whole thing is flush. I did not do any stamping on this card–wow! That is pretty unusual, but die cuts were the stars for this one. It was also fun to use all of these different companies’ products combined into one card. Love to do that! Thanks for stopping by.