I created this by using what I have–and what I’ve already cut and stamped out! Between classes I’ve taught and past projects, I’ve got a lot of bits and pieces to work with. Sometimes it is fun to see what I can come up with by just using those miscellaneous elements. I will list all of the products I used below.
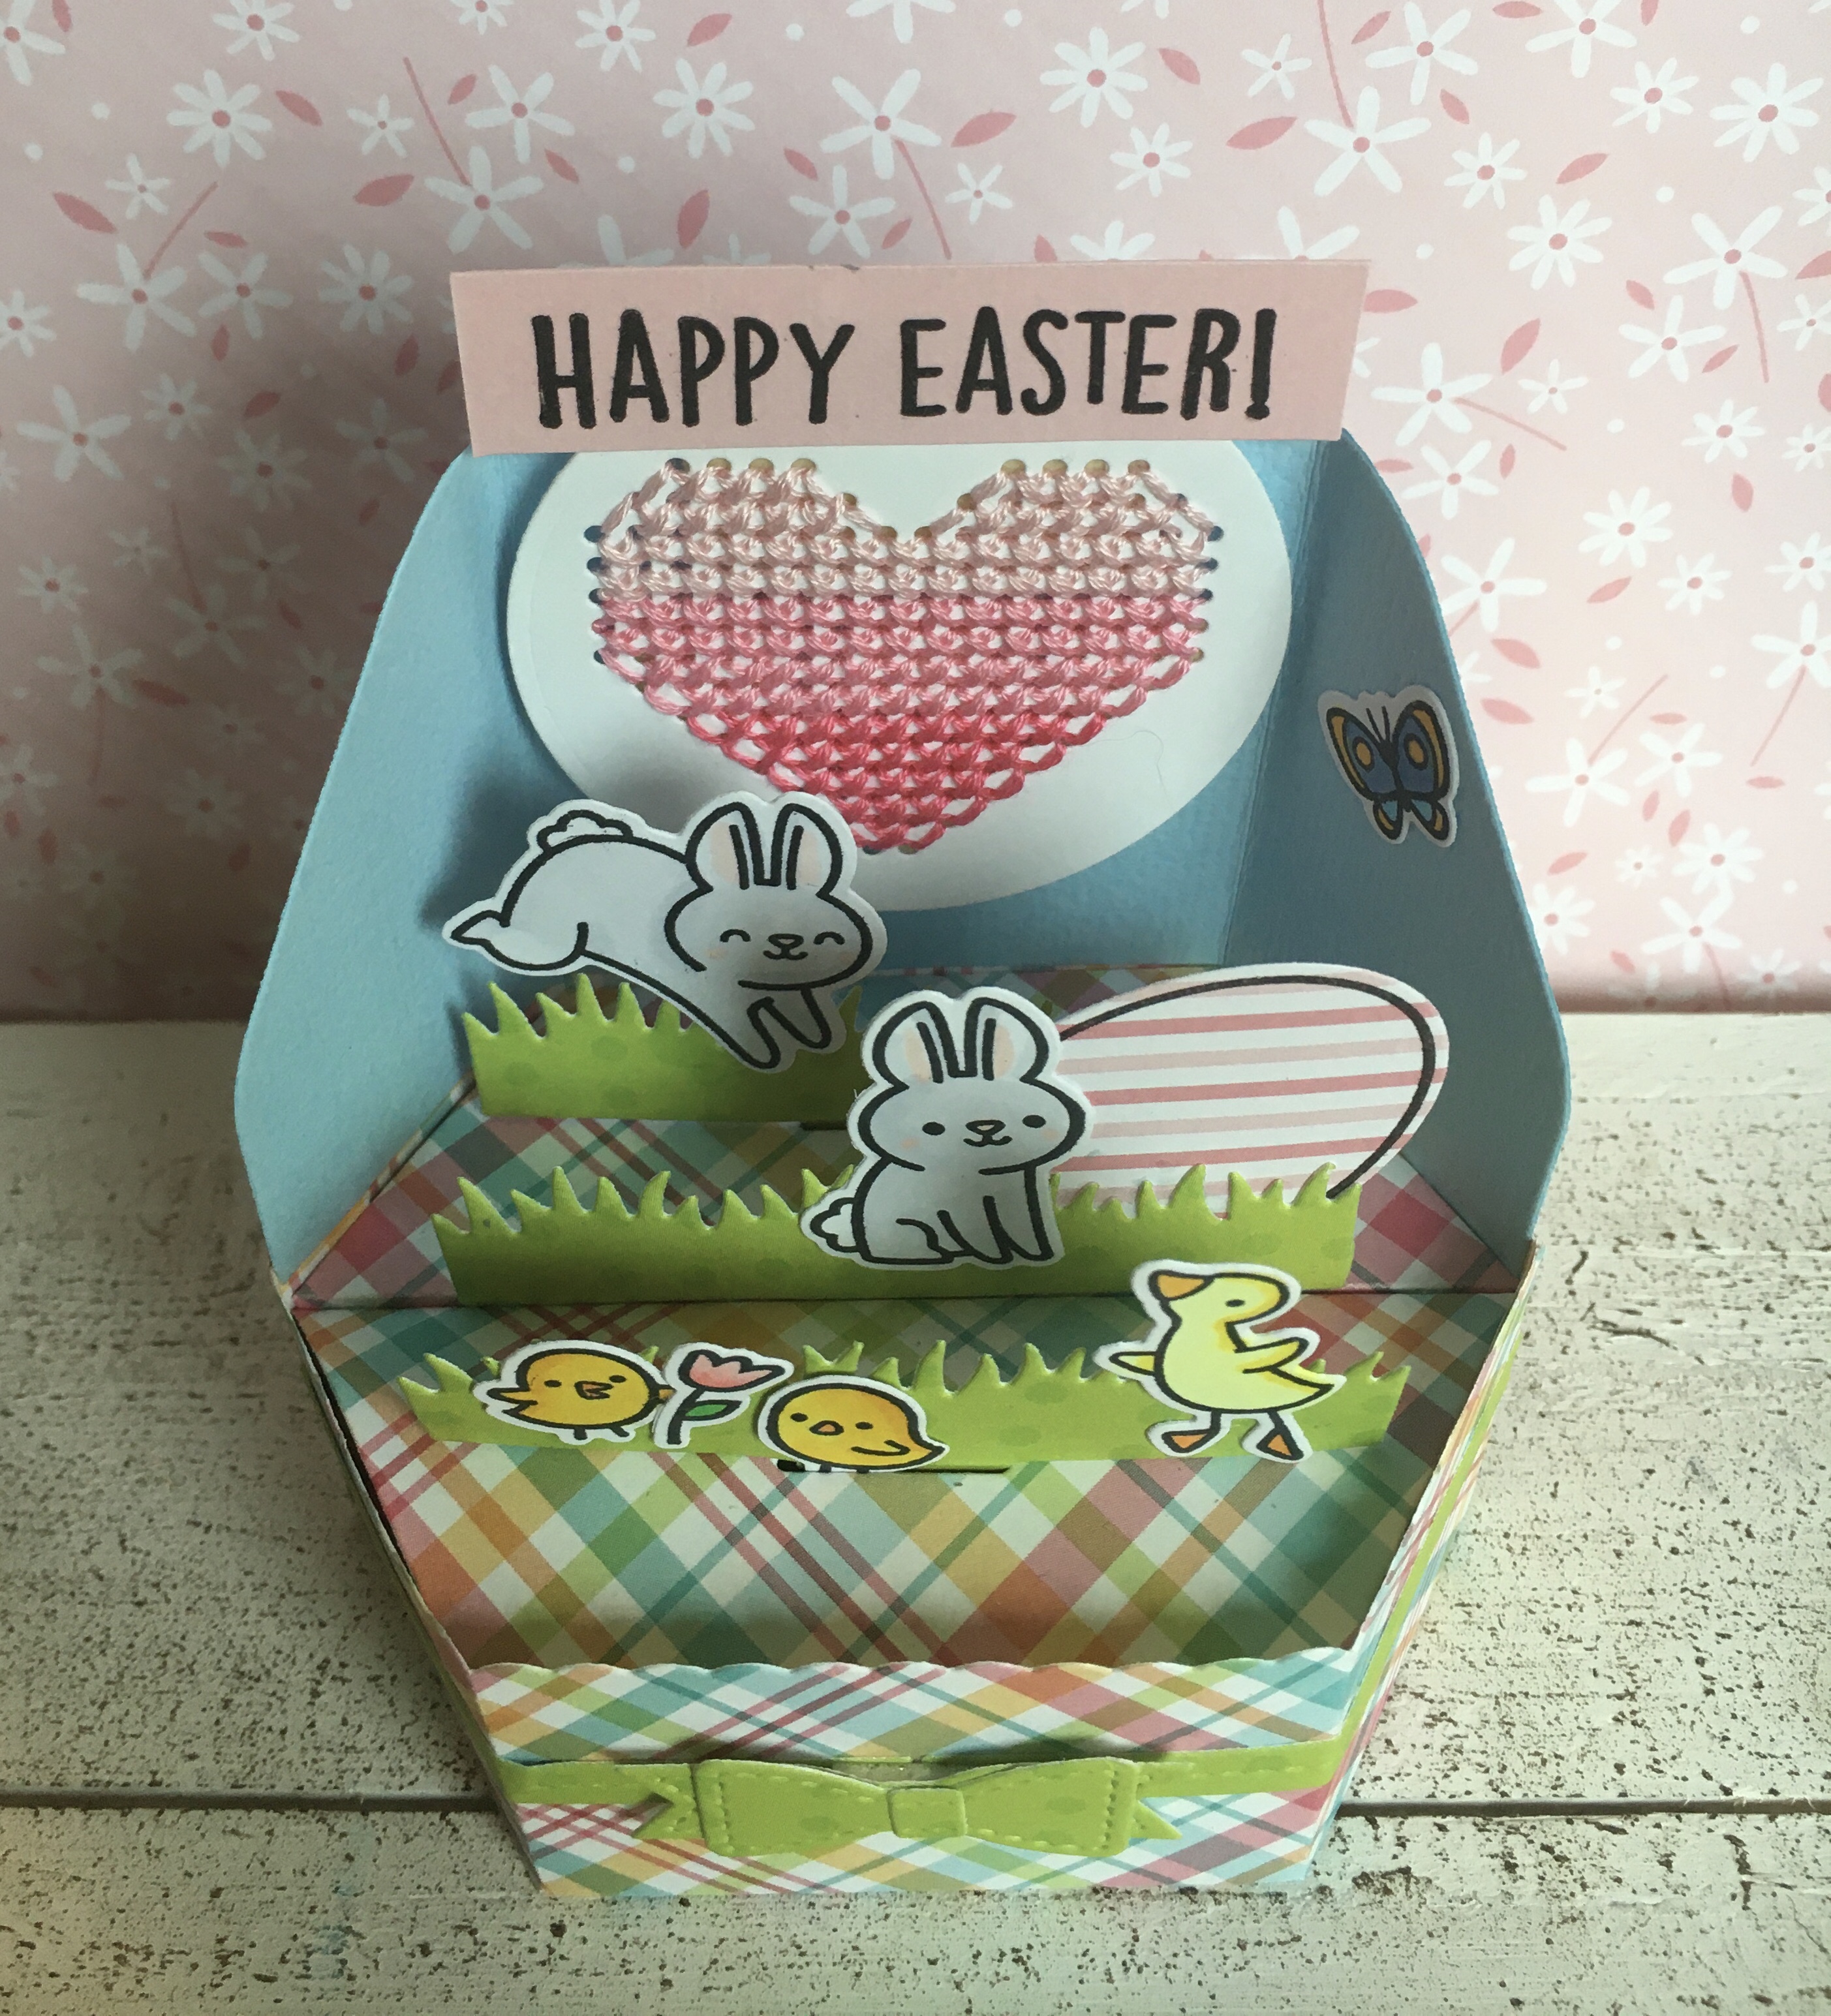
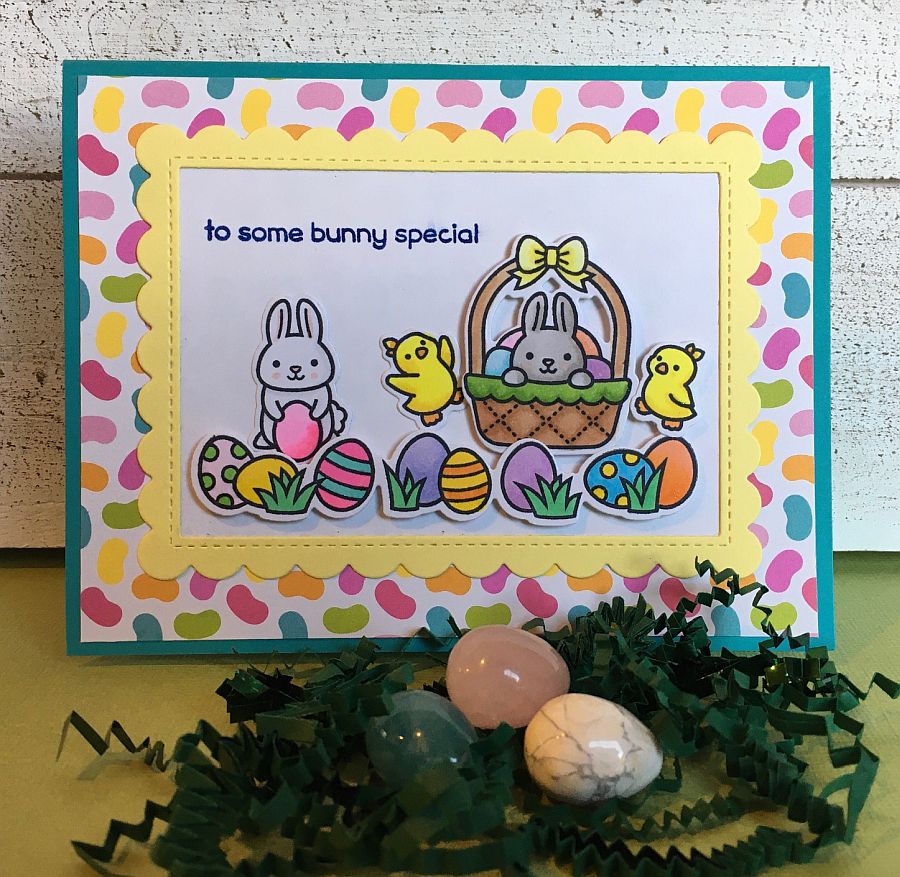
I was really anxious to do some cross stitching on one of the new Lawn Fawn Embroidery Hoop dies. I have deadline I should be designing for, but I couldn’t stand it any longer! I decided to use three shades of pink to stitch the heart for an Ombre effect. The stitching went quite quickly and I chose not to put it into the hoop part of the die set. I decided to use it for a backdrop on a Pop-up Platform with an Easter scene. These critters are so cute and I had a lot of them from the classes I taught recently. I colored them with Copic markers.
This dimensional scene folds flat for mailing, which is really amazing! Lawn Fawn dies are designed so well. It is almost more of a gift than a card–a great surprise for any recipient.
Lawn Fawn Eggstraordinary Easter stamps and dies
Lawn Fawn Eggstraordinary Easter Add-on stamps and dies
Lawn Fawn Embroidery Hoop dies
Lawn Fawn Rub-a-dub-dub Flip-flop stamps and dies
Lawn Fawn Platform Pop-up dies
Lawn Fawn Platform Pop-up Add-on dies
Lawn Fawn Flower Market and Perfectly Plaid papers
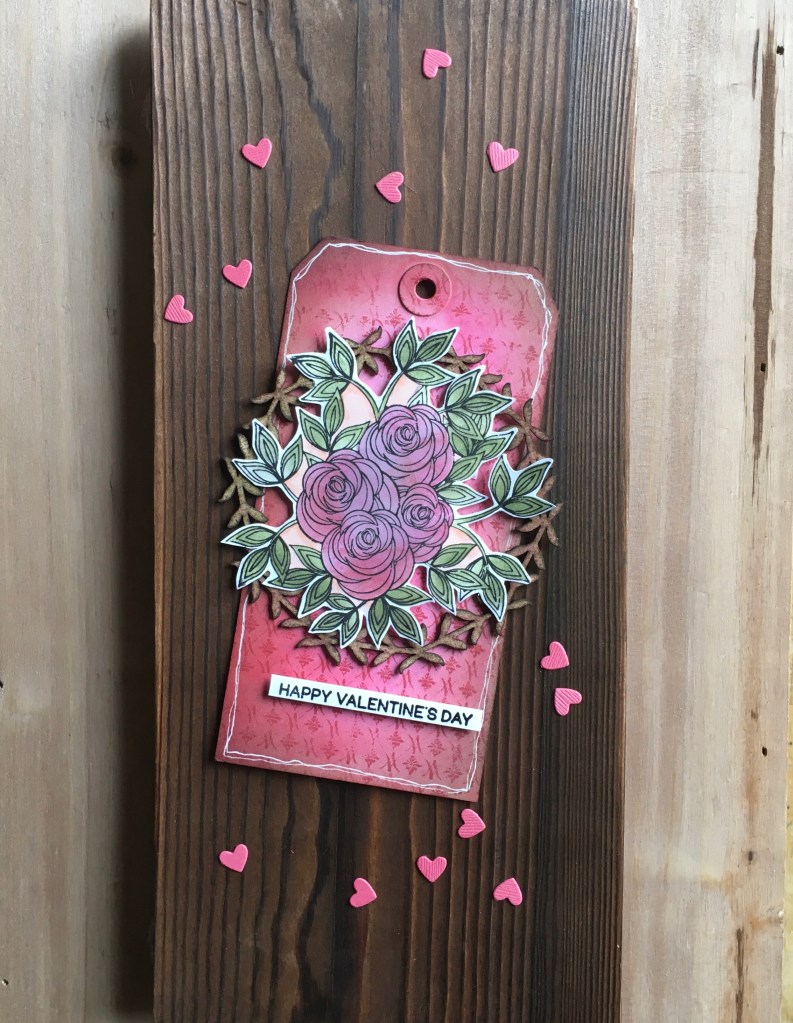
Happy February! I’m enjoying all things Valentine at the moment and pulled out a delightful rose image from Wendy Vecchi and Stampers Anonymous to work with for a Valentine tag. I’ll share a few of my steps here, and you will see that this came together quite simply.
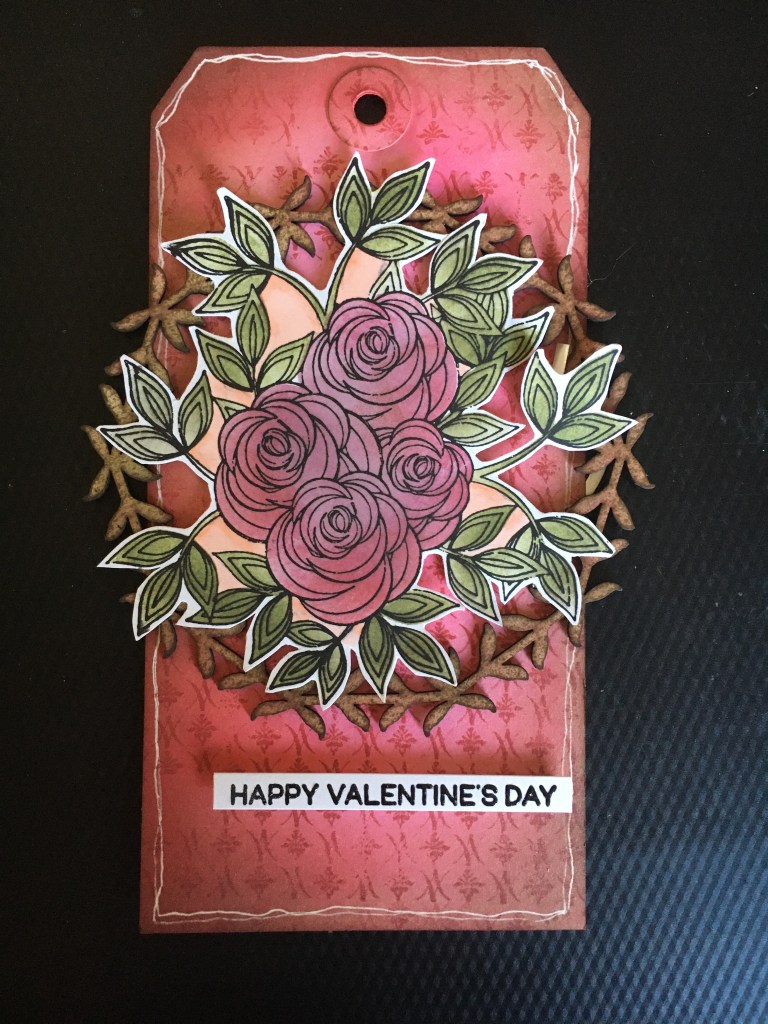
I began by stamping the rose image from the Stampers Anonymous SCS175, “Rosy Art” set by Wendy Vecchi Studio 490 onto plain white cardstock. This set has a really cute picnic basket and nice sentiments as well, but I decided to use just the flowers for the real estate I had to work with on the tag I’d chosen.
The really cool thing about this stamp set (and a number of others designed by Wendy) is that it comes with stencils! So you can add color to areas of your image easily while blocking out other areas. This set also has a mask that can be used to cover the roses, which means you can add color to the leaves without giving your flowers an inadvertent green cast!
I used Ranger Archival inks in Rosey Posey (appropriate!) and Red Geranium to blend color onto the roses with blender brushes. Post-it Notes are kind of requirement for me, which covered the open areas of the stencil if I got overly zealous with my blending. I didn’t photograph it, but I moved onto the leaves after this and used Fern Green and Prickly Pear Archival inks to color all of the leaves, also using the stencil. I filled in the area between flowers with Copic markers (E01 and E02) so it wasn’t stark white.
I had a tag in my stash that had a background already done using Red Geranium Archival ink and alcohol. I try to do a number of backgrounds at once, so I can just grab one when I’m ready to make a card or tag. If you’d like to know more about this background technique, Wendy Vecchi has a number of tutorials and wonderful classes that cover it and I highly recommend you check them out if you haven’t. With the color down, I stamped the Stampers Anonymous Vintage Tapestry background stamp onto it, also with Red Geranium for a bit of tone-on-tone. I then blended Acorn Archival onto the edges to give a more aged, vintage look.
I placed the trimmed out, colored rose image onto a chipboard wreath (Ranger Ink Chippies: Wreathes) for some dimension. Here you can see that I applied Acorn archival ink to the wreath to pick up on the aged look of the tag. To finish the tag, I doodled a white border onto the tag with a white gel pen, hoping to visually pull it together since the flowers have a white border. I popped up the roses and wreath on the tag with foam tape and also popped up sentiment (from Everyday Sentiment Strips by Hero Arts).
And there you have the finished tag. Please let me know if you have any questions. As you most likely know, you can also find me on Instagram and Facebook @penguiinpapers
Ranger Ink Wendy Vecchi Make Art – Doodle Christmas (wreath and branches) and Warm Wishes (sentiment)
Stampers Anonymous WVBG016 – Lots of Leaves (background)
Die:
Penny Black 51-731 – Soaring
Inks:
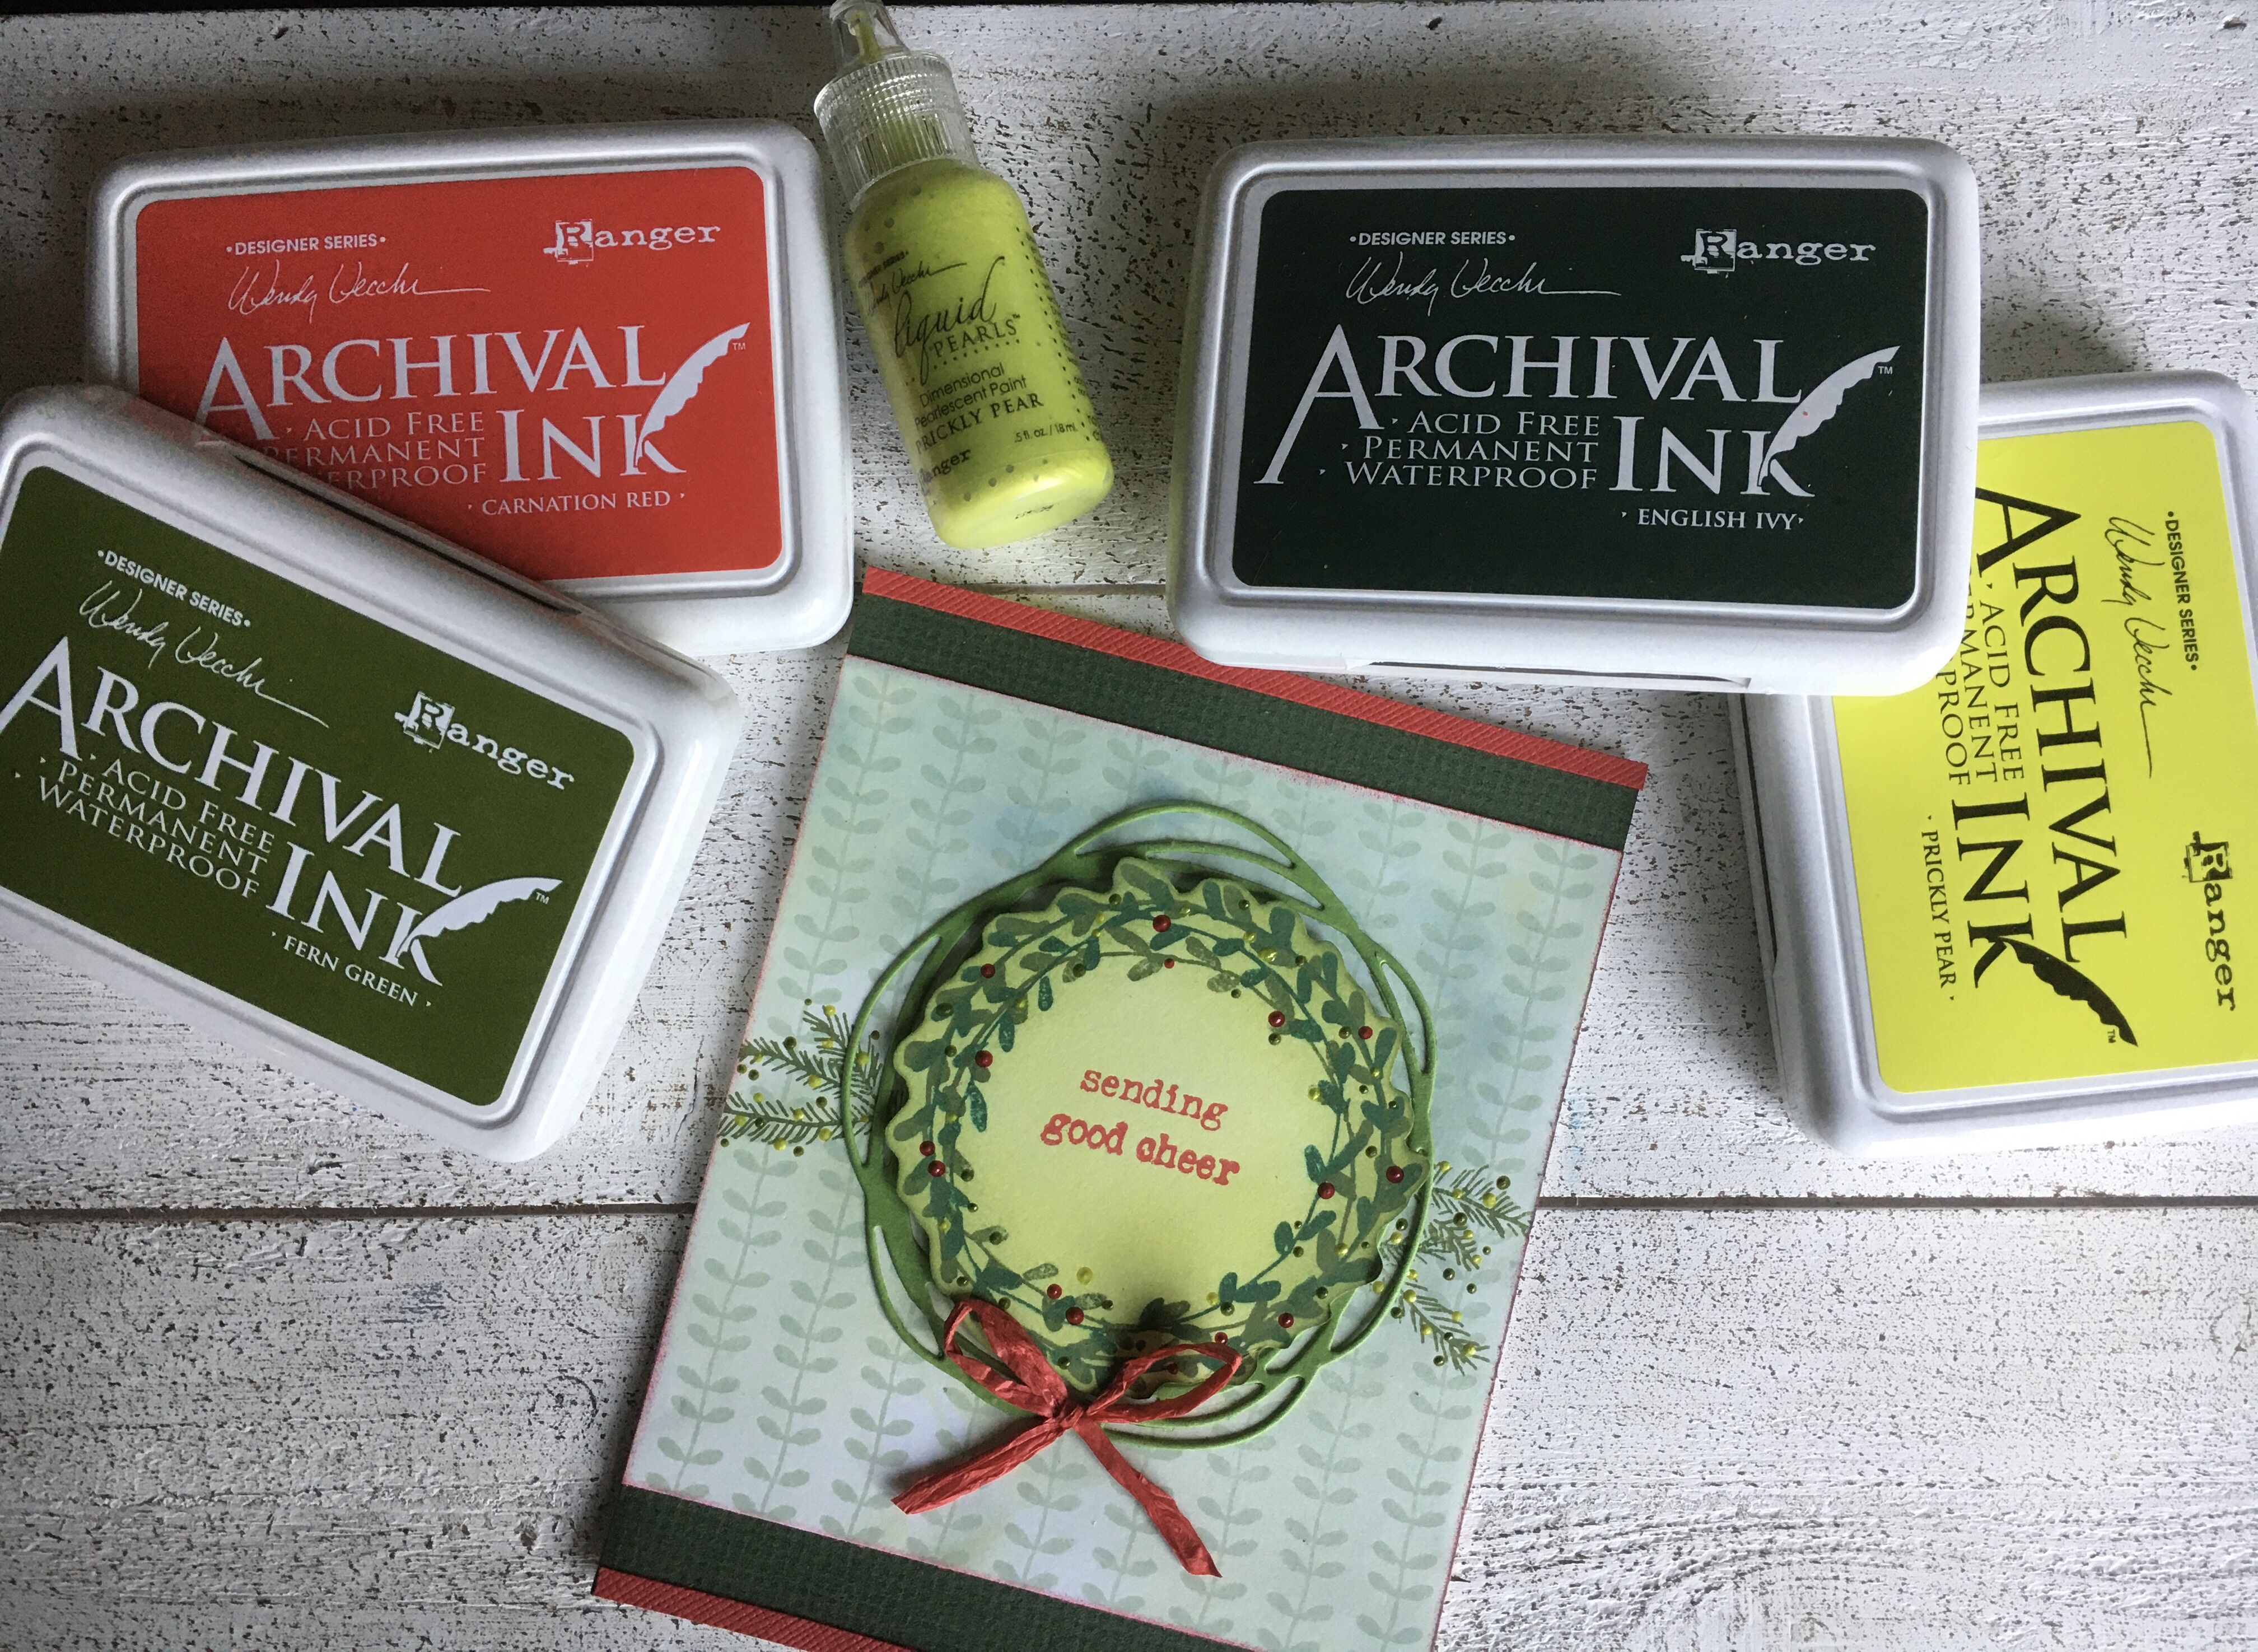
Ranger Ink Wendy Vecchi Designer Archival Ink Series: Fern Green, Prickly Pear, English Ivy, Carnation Red
Ranger Ink Leaf Green, Sap Green, Cornflower Blue
Embellishments:
Ranger Ink Wendy Vecchi Designer Series Liquid Pearls – Prickly Pear, Fern Green, Carnation Red
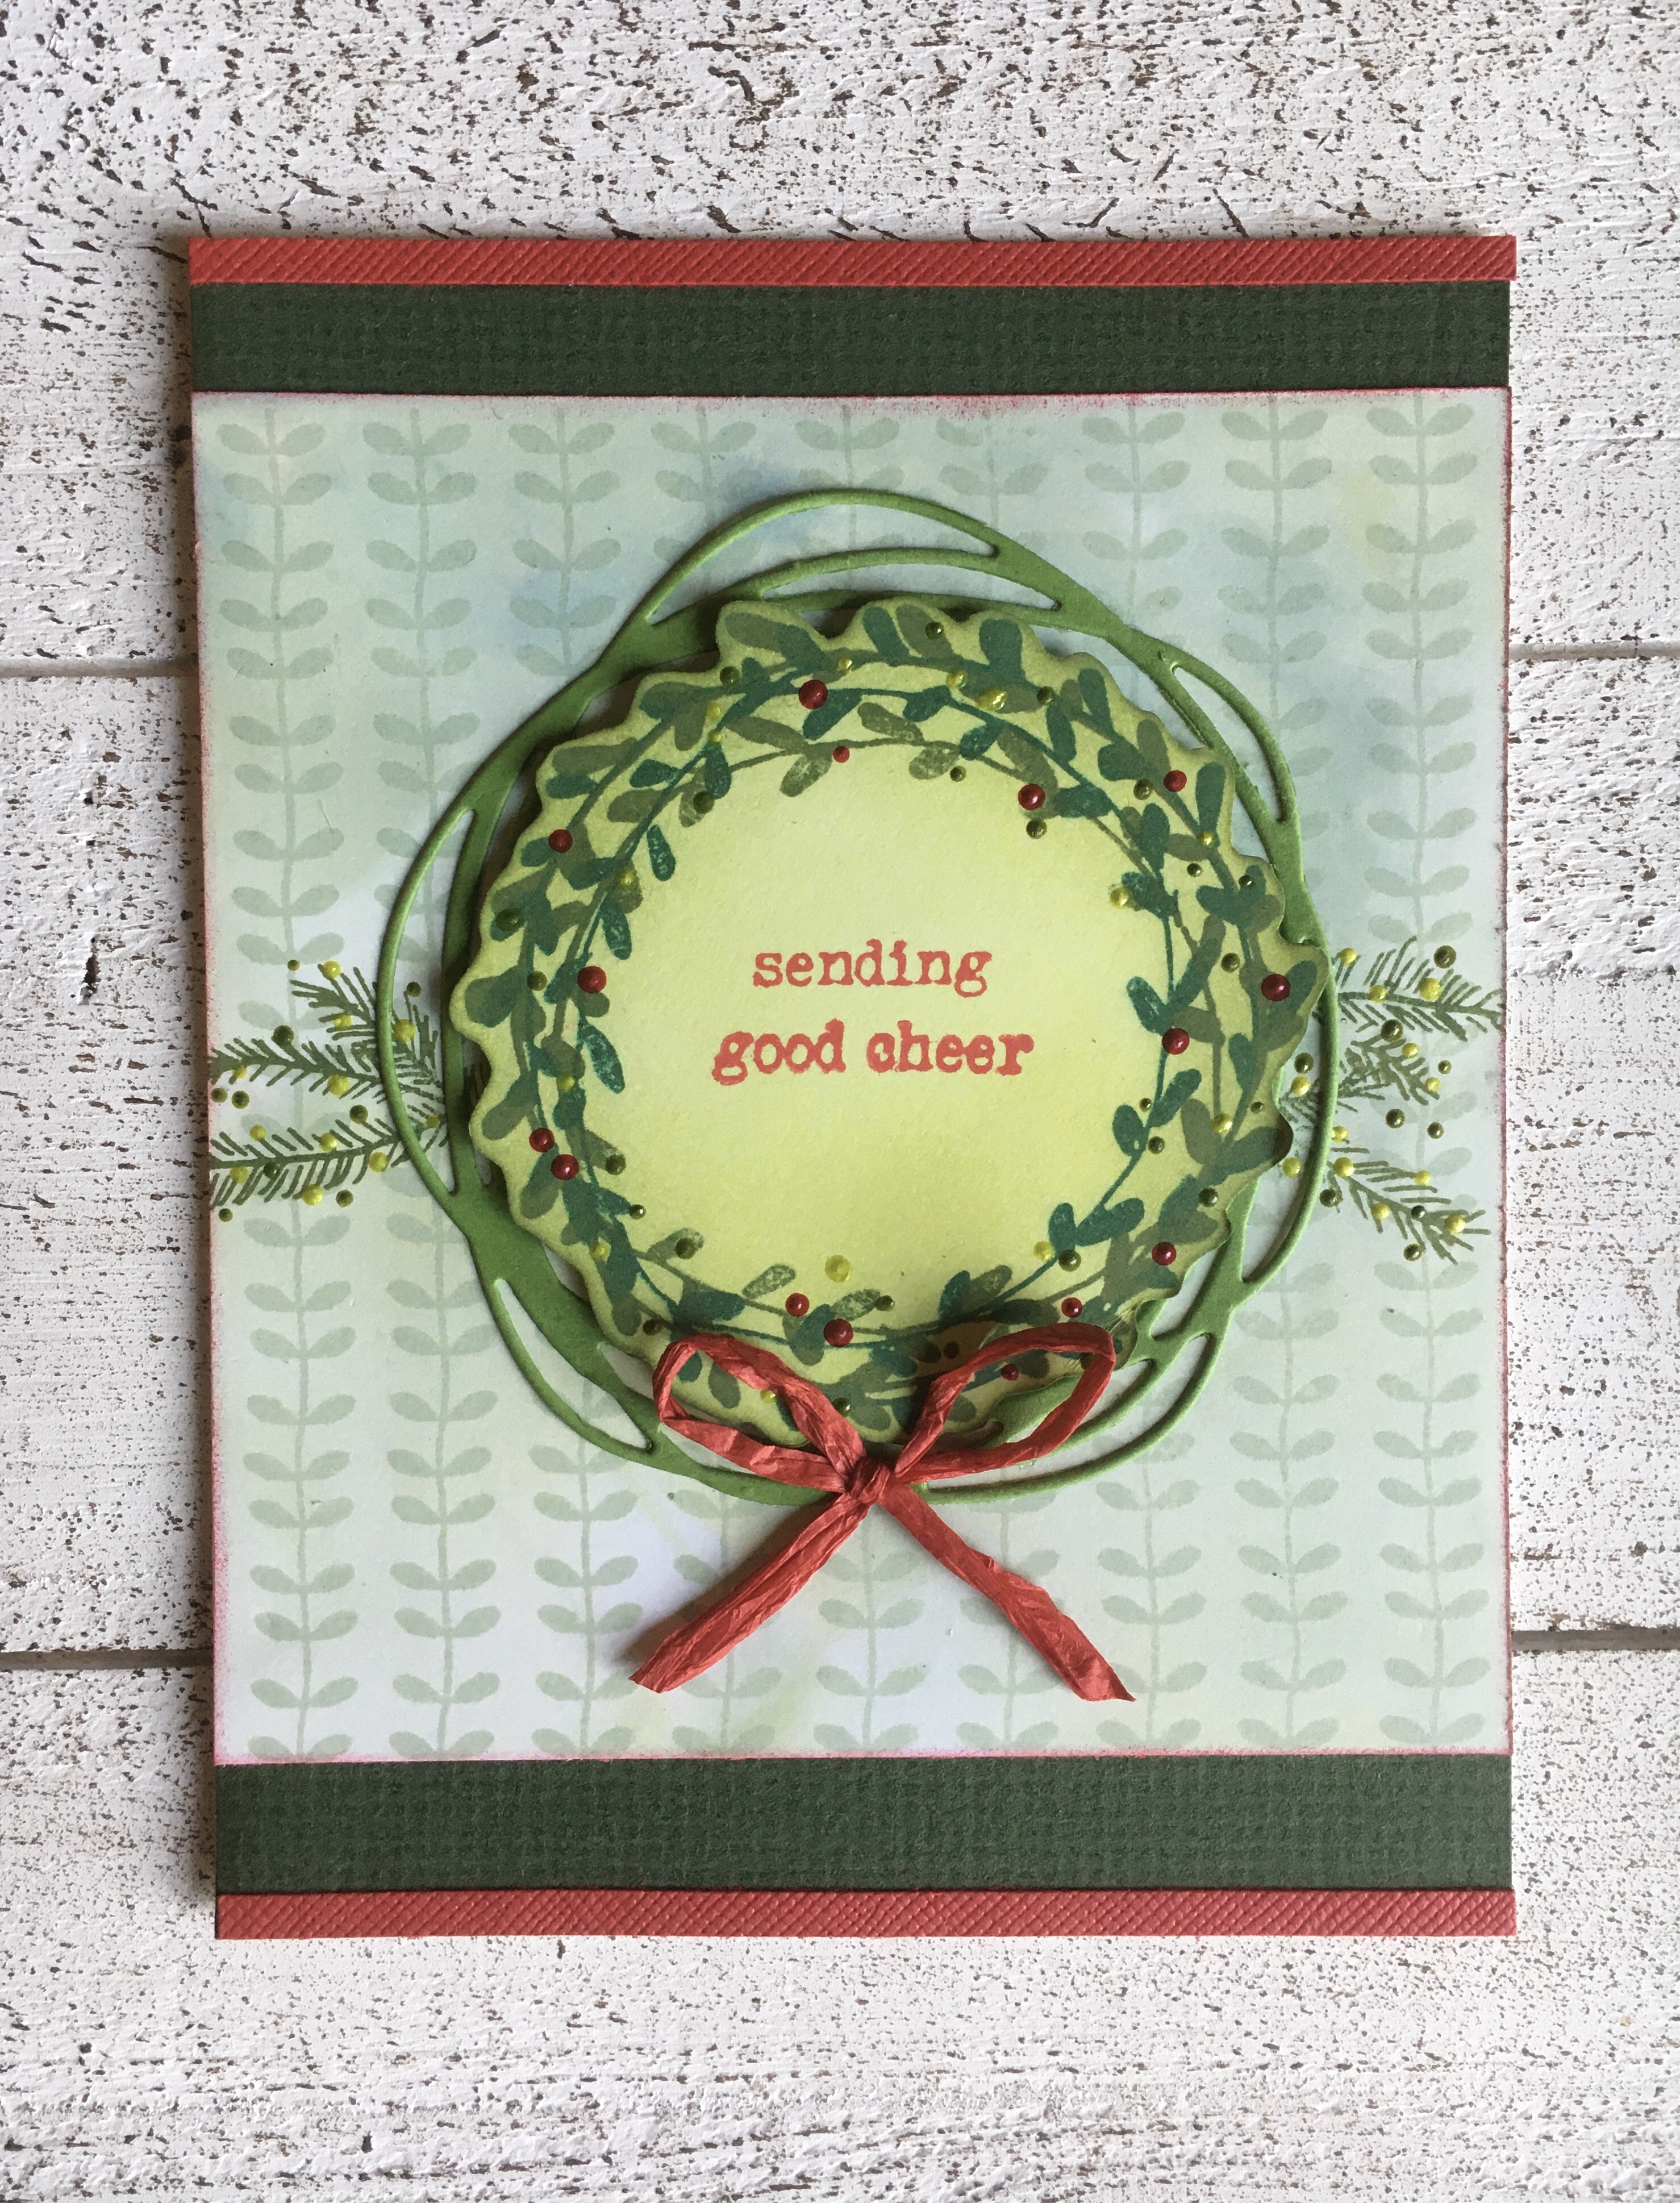
I’m excited about the new Wendy Vecchi Make Art release from Ranger Ink that just came out today! So many possibilities for holiday cards, tags, and decorations. But the stamps are versatile enough that some “everyday” cards will be easy to make with them.
I got my hands on the new products today and immediately made a simple card. I started out with the background using Wendy Vecchi’s archival ink and alcohol technique. I used Cornflower Blue and Lead Green re-inkers and rubbing alcohol and once dry, I stamped The background stamp in Sap Green.
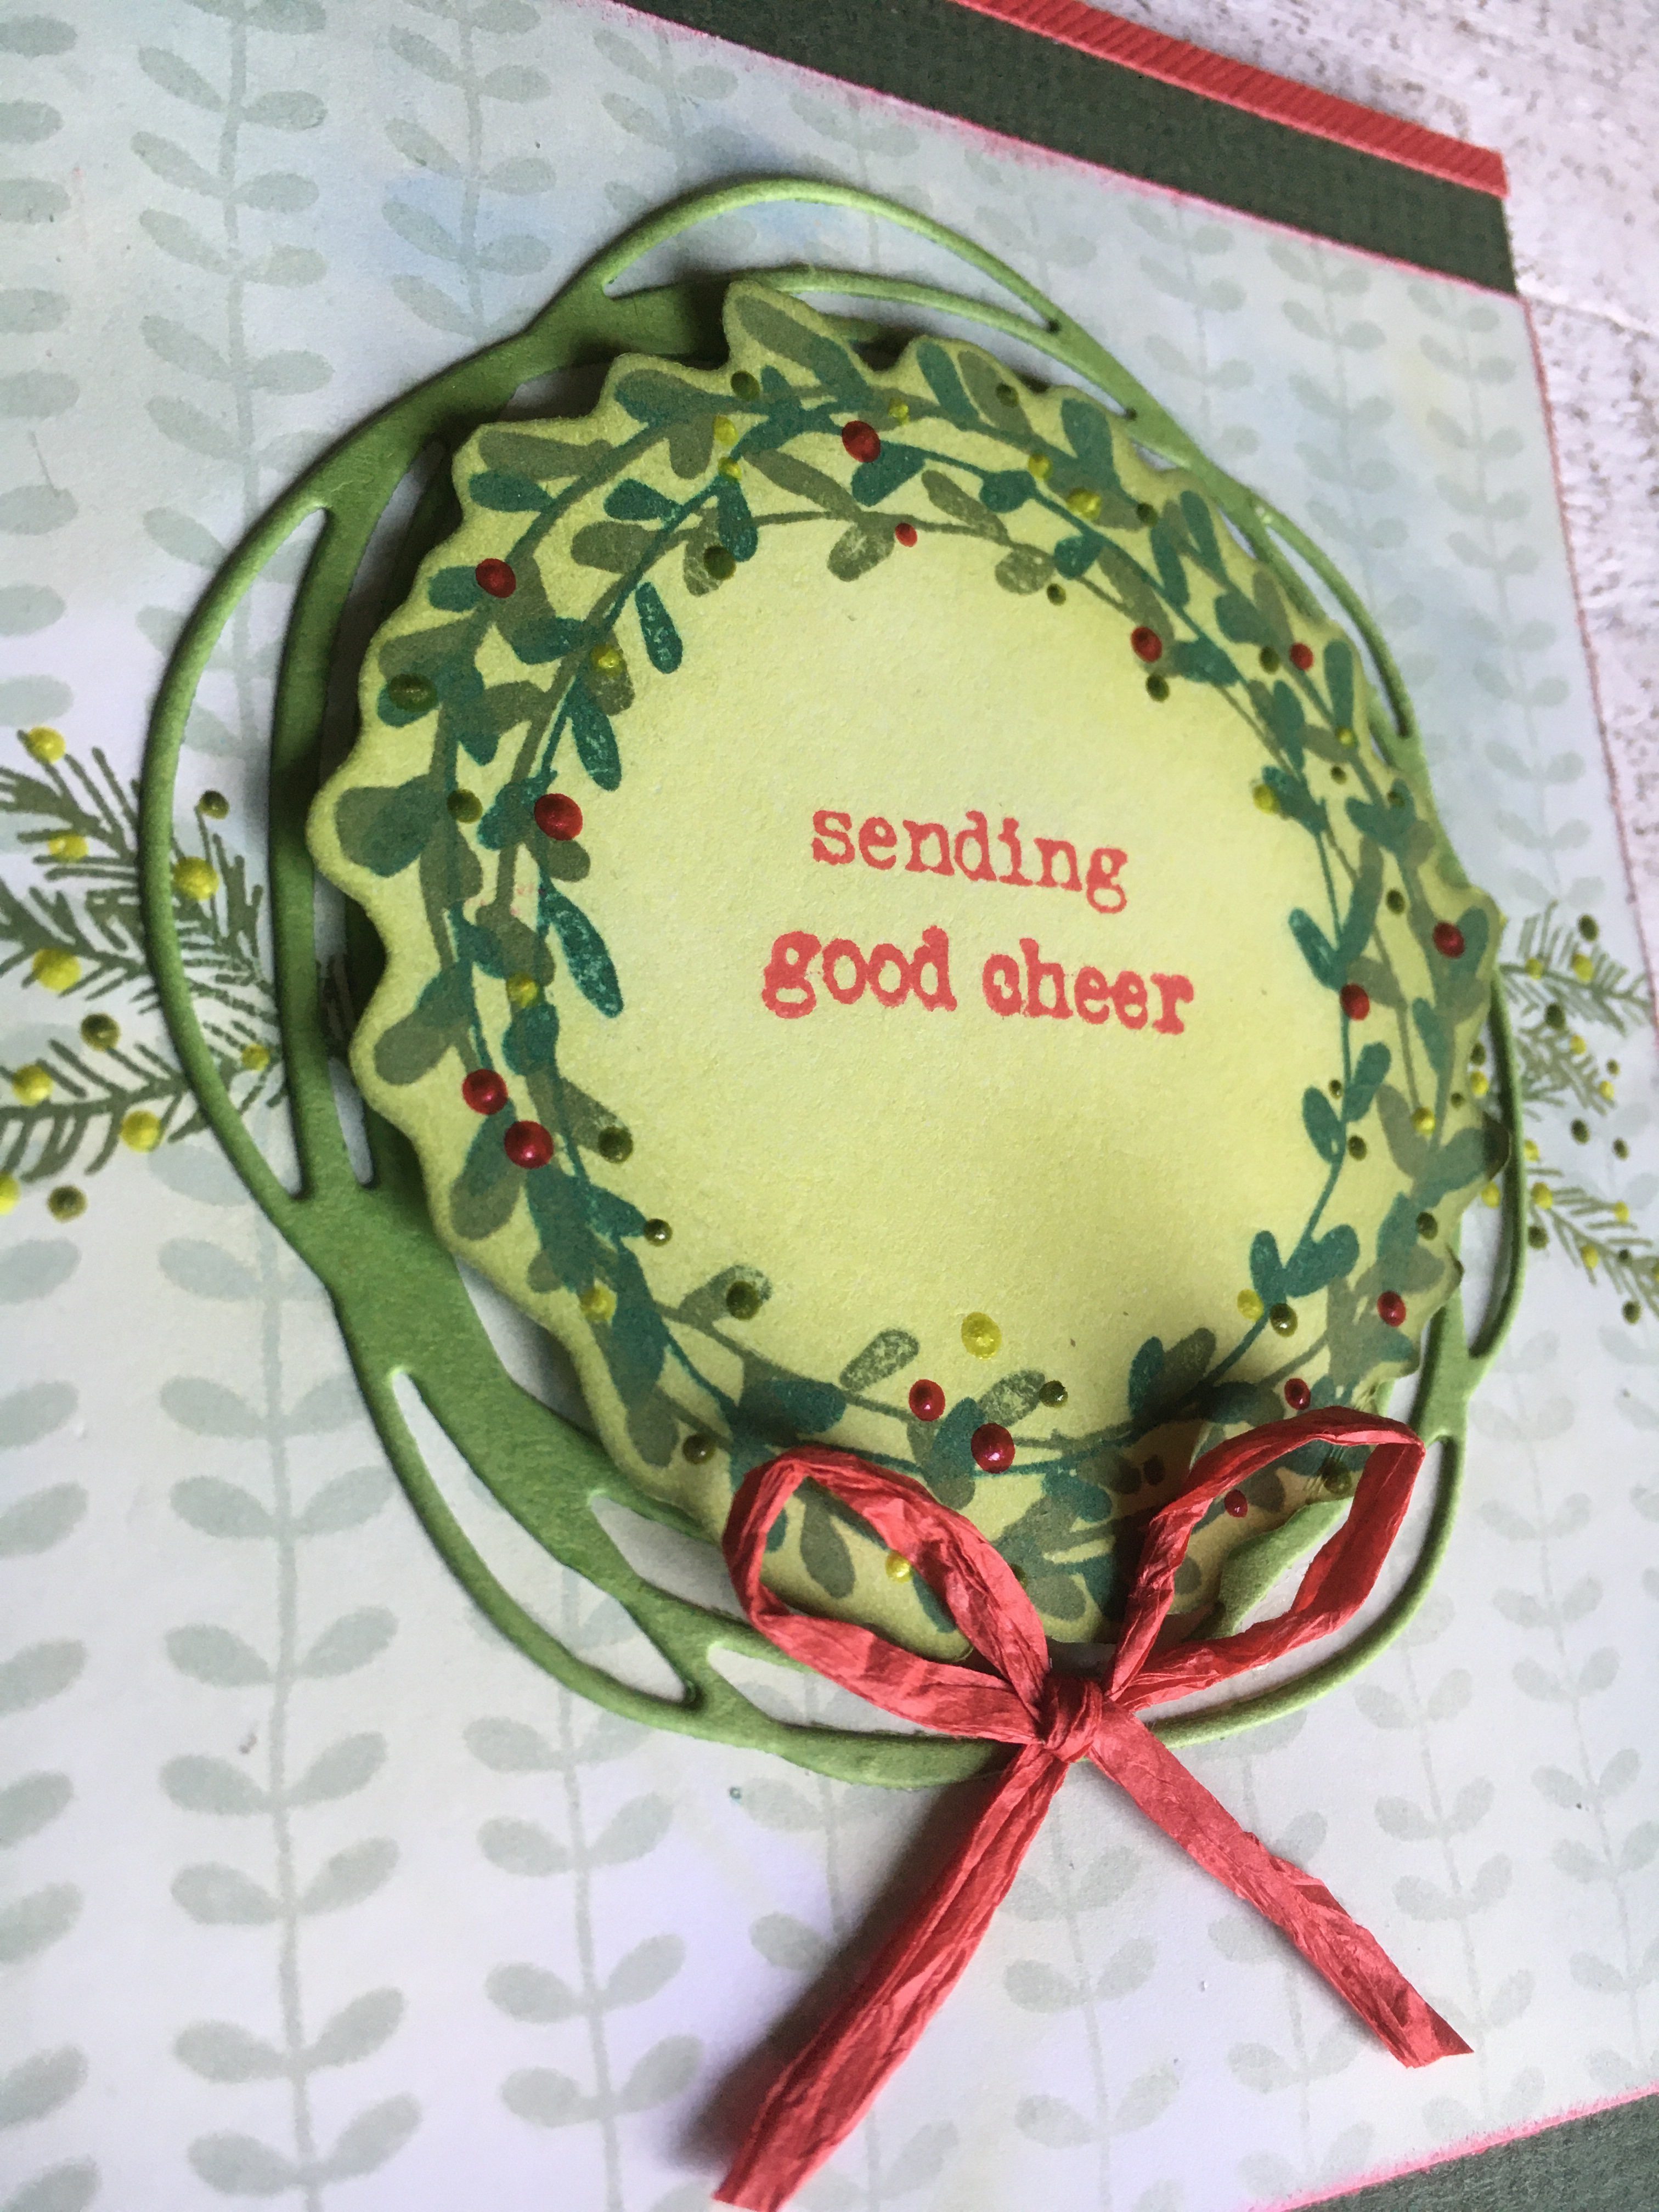
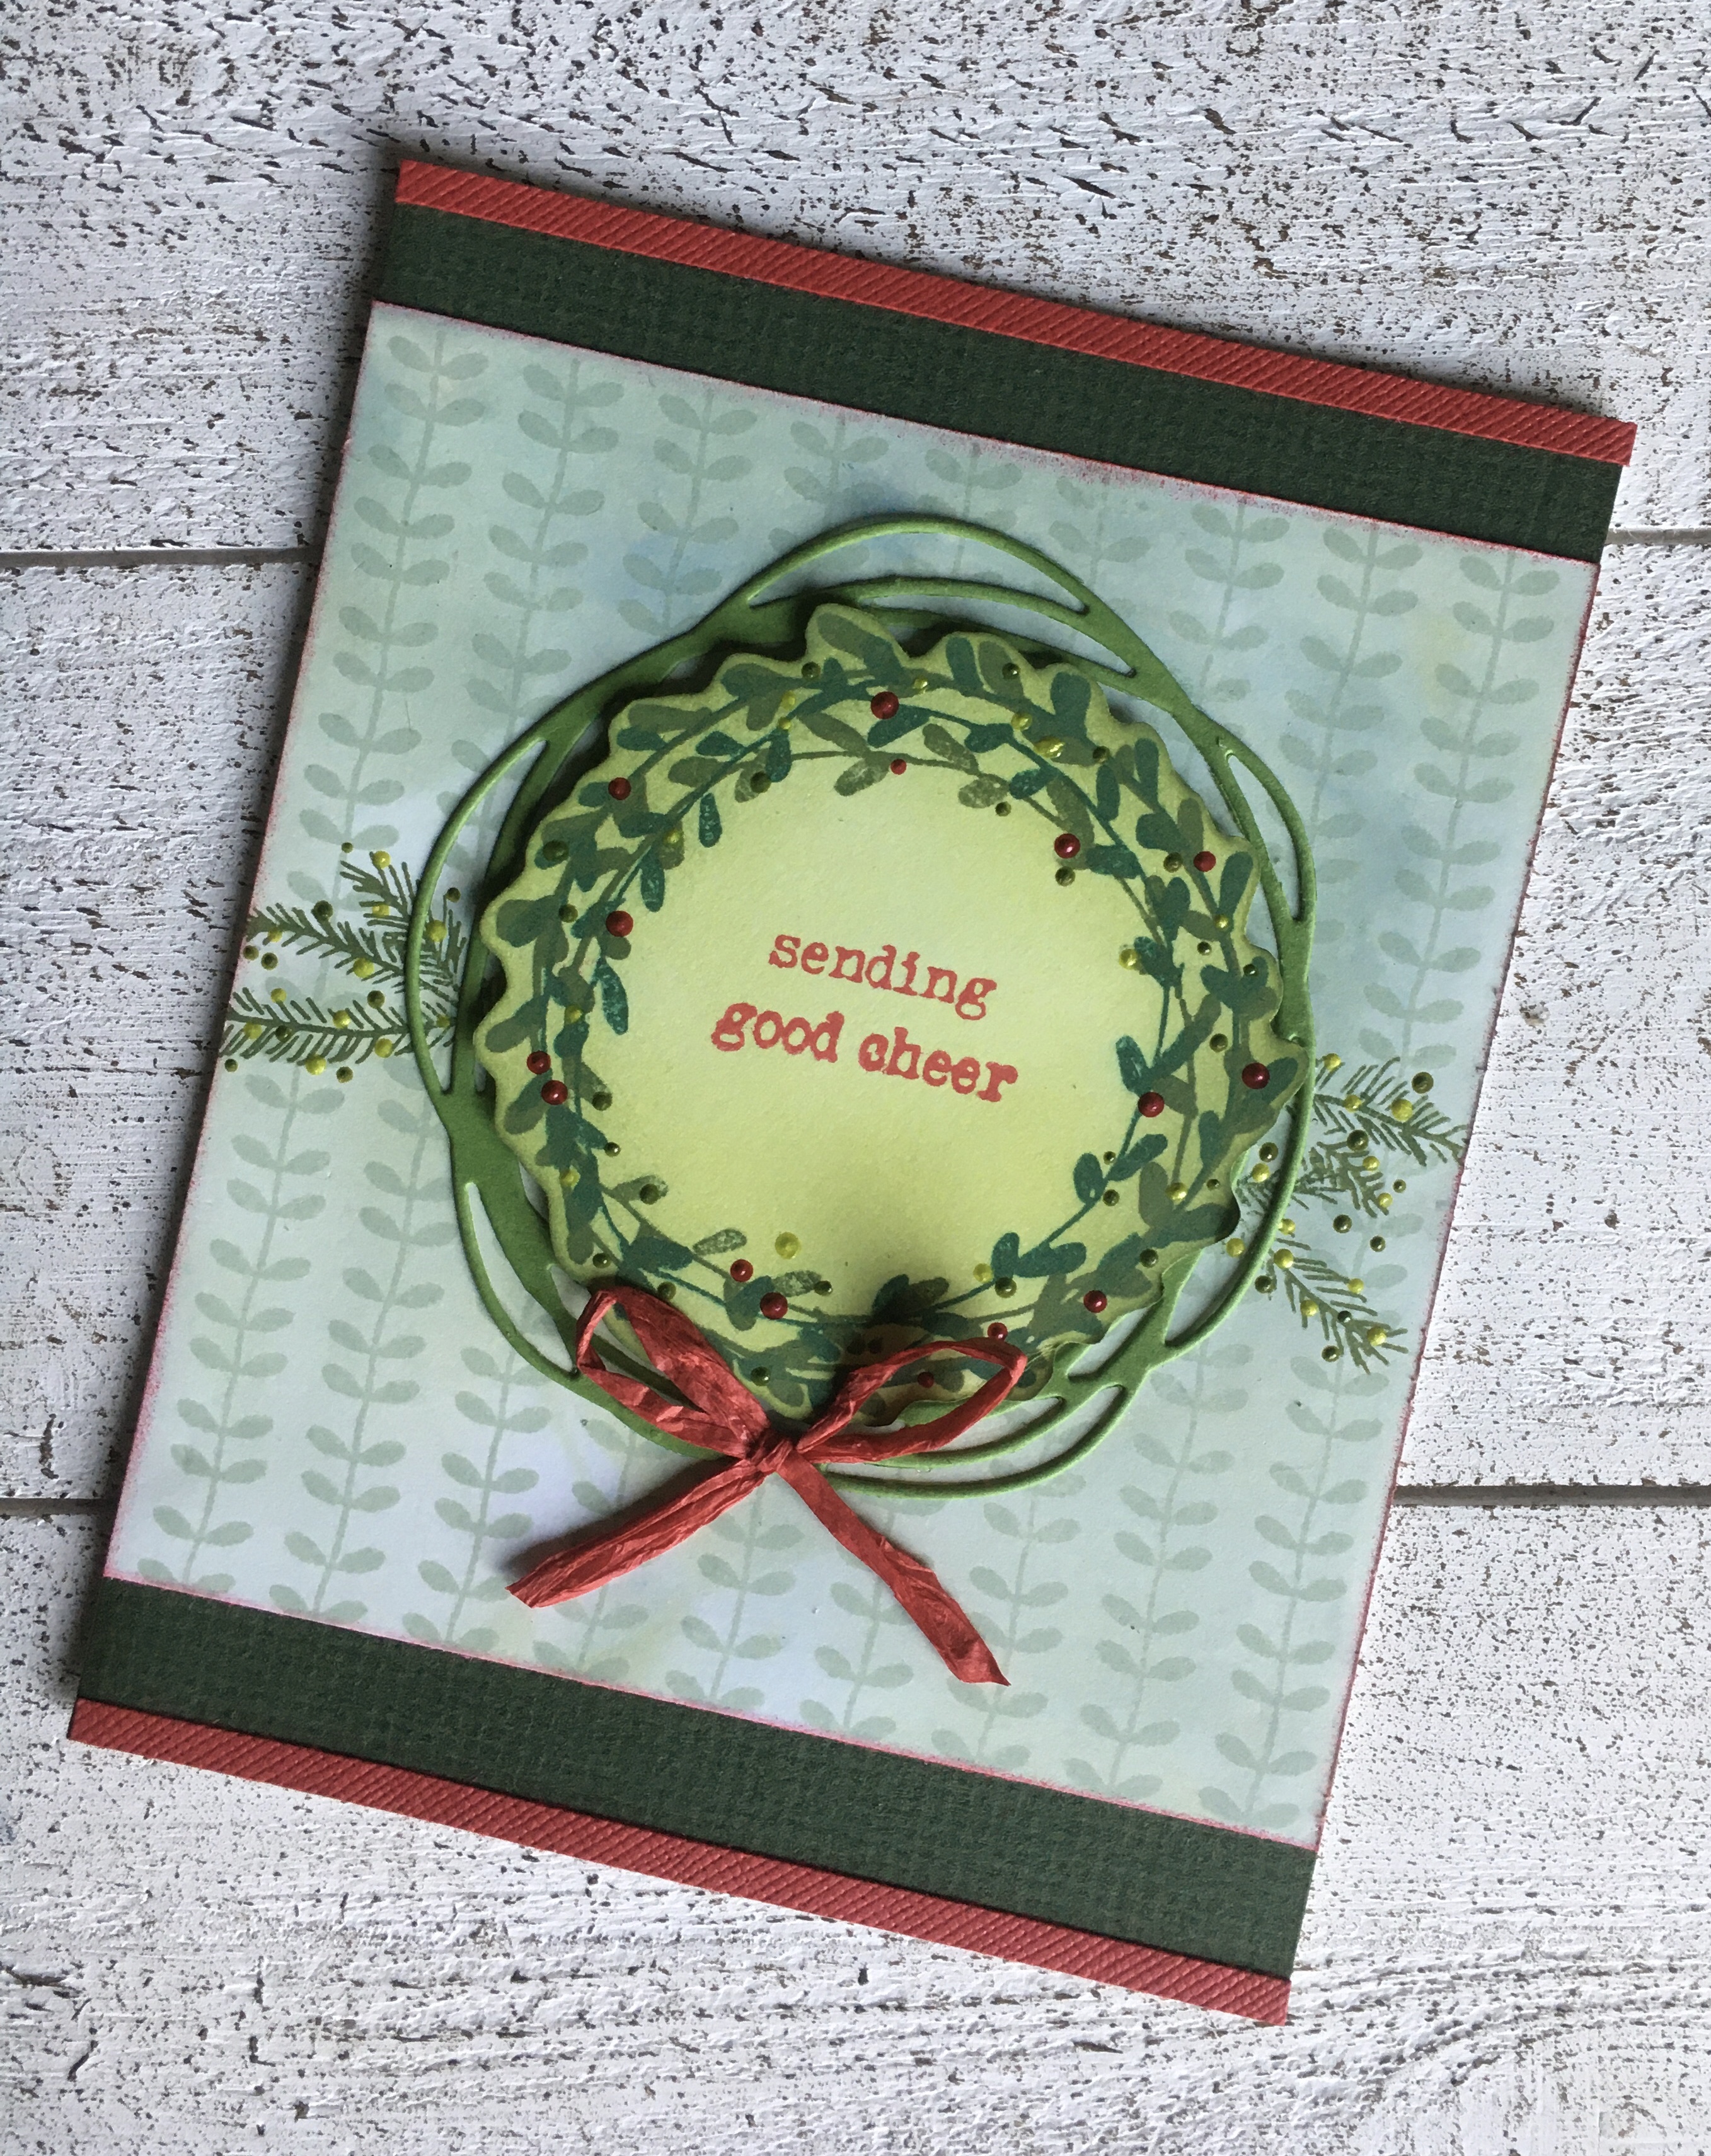
To create the wreath, I stamped Wendy’s wreath stamp in English Ivy and then turned it 90 degrees or so and stamped it again in Fern Green. I trimmed it out and then blended Prickly Pear ink over the whole image. Meanwhile, I stamped the branches across the center of my background. I adhered the die-cut wreath onto the background. Once the wreath was completely dry, I stamped the sentiment and then added the Liquid Pearls “berries” on the wreath and the branches. I then popped up the wreath with dimensional adhesive and added a red raffia bow. I trimmed the card with red and dark green cardstock strips.
Thanks for stopping by today (Hi, Mom!). I do regularly post on Instagram (@penguinpapers) if you want to see what I’m up to. I still plan to post here when I can–especially cards!
Die (love sentiment) – My Favorite Things Lots of Love
Die (cloud) – Lawn Fawn Stitched Rainbow
Die (stitched heart window) – Lawn Fawn Outside In Stitched Heart Stackables
Patterned paper – Doodlebug Designs Love Notes
Copic markers
Cardstock
I am still having a good time making Valentines, and again I’m featuring a cute critter. Gotta do it! Critters are just meant to be on Valentines! This is a simple card with just a few stamped images and a few dies. I was guided as I designed it by the sketch in the current challenge on the My Favorite Things website (sketch is shown below). Thanks for visiting today.
I made a little collection of critter Valentines this year featuring Lawn Fawn stamps and dies. I’m keeping them in the family since I’m giving them to my mom to share. Maybe if I’m good, I’ll get one back!
I colored all of the cute critters with Copic markers with very simple blending and I used some patterned papers I had on hand to add some festive backgrounds. I’ll provide my supply list below and then I’ll give you a look at each card individually.
Supplies
Lawn Fawn stamp and die sets:
Scent with Love stamps and dies
Scent with Love Add-on stamps and dies
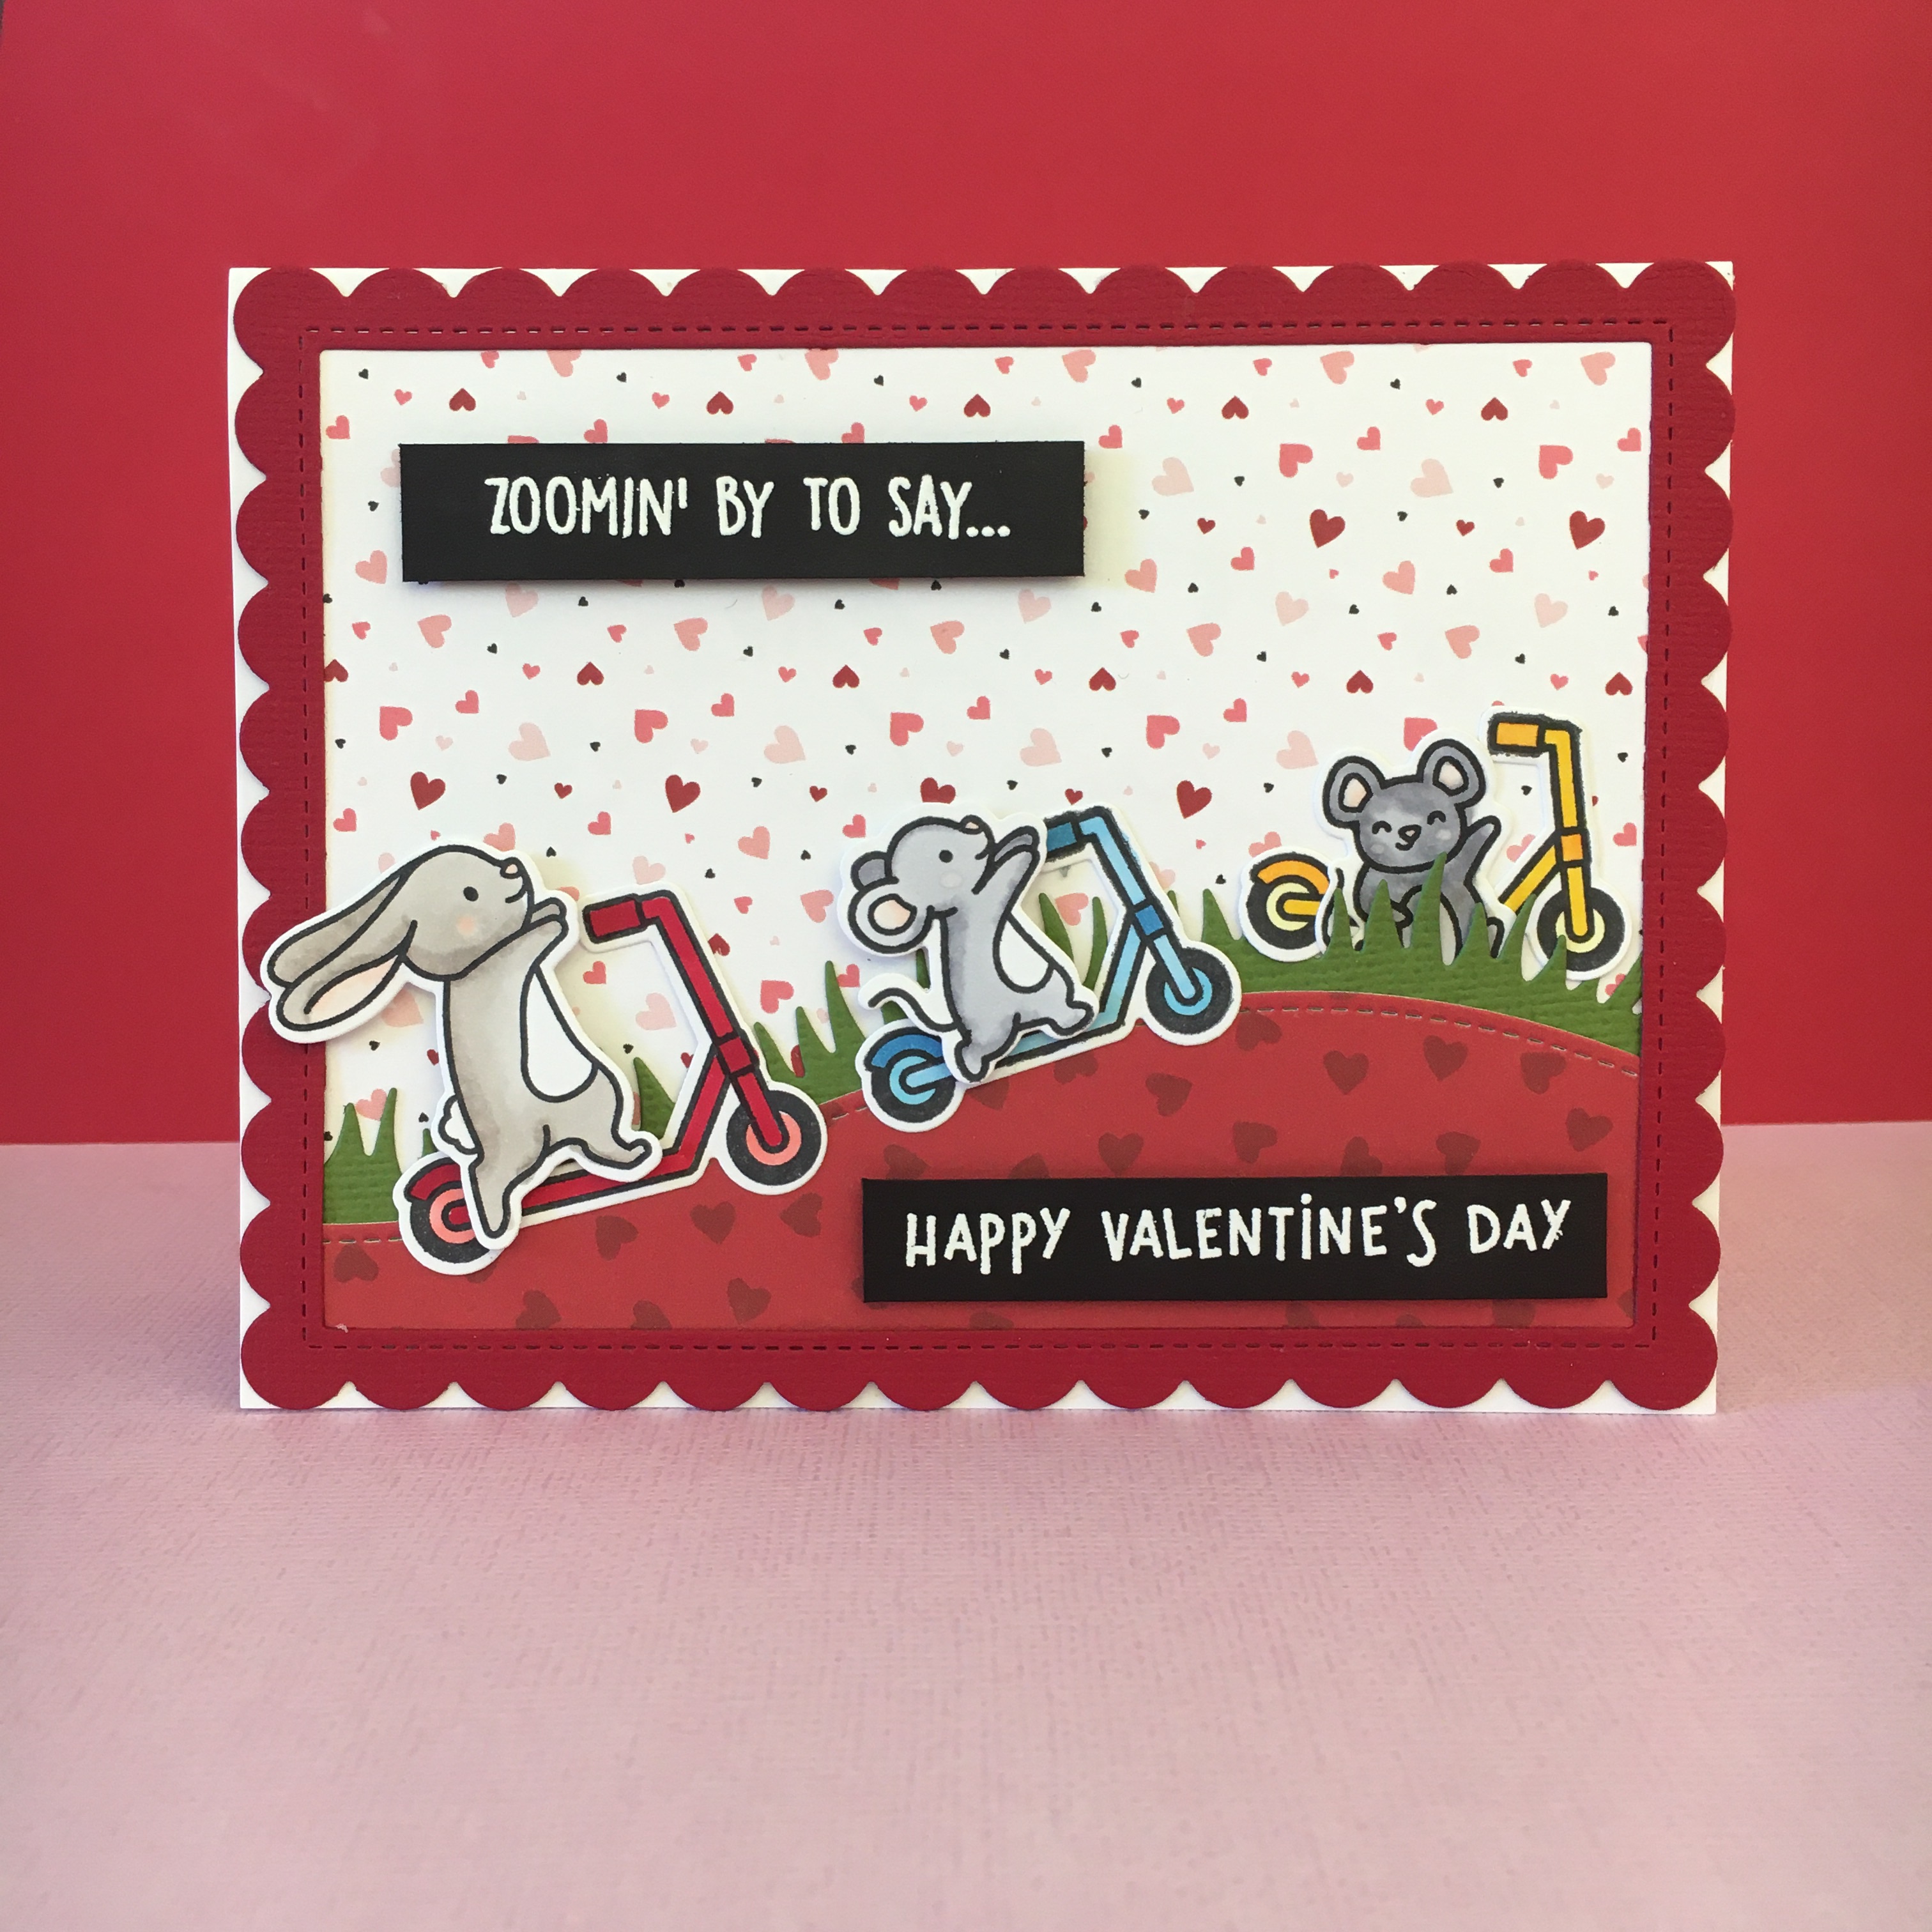
Scootin’ By stamps and dies
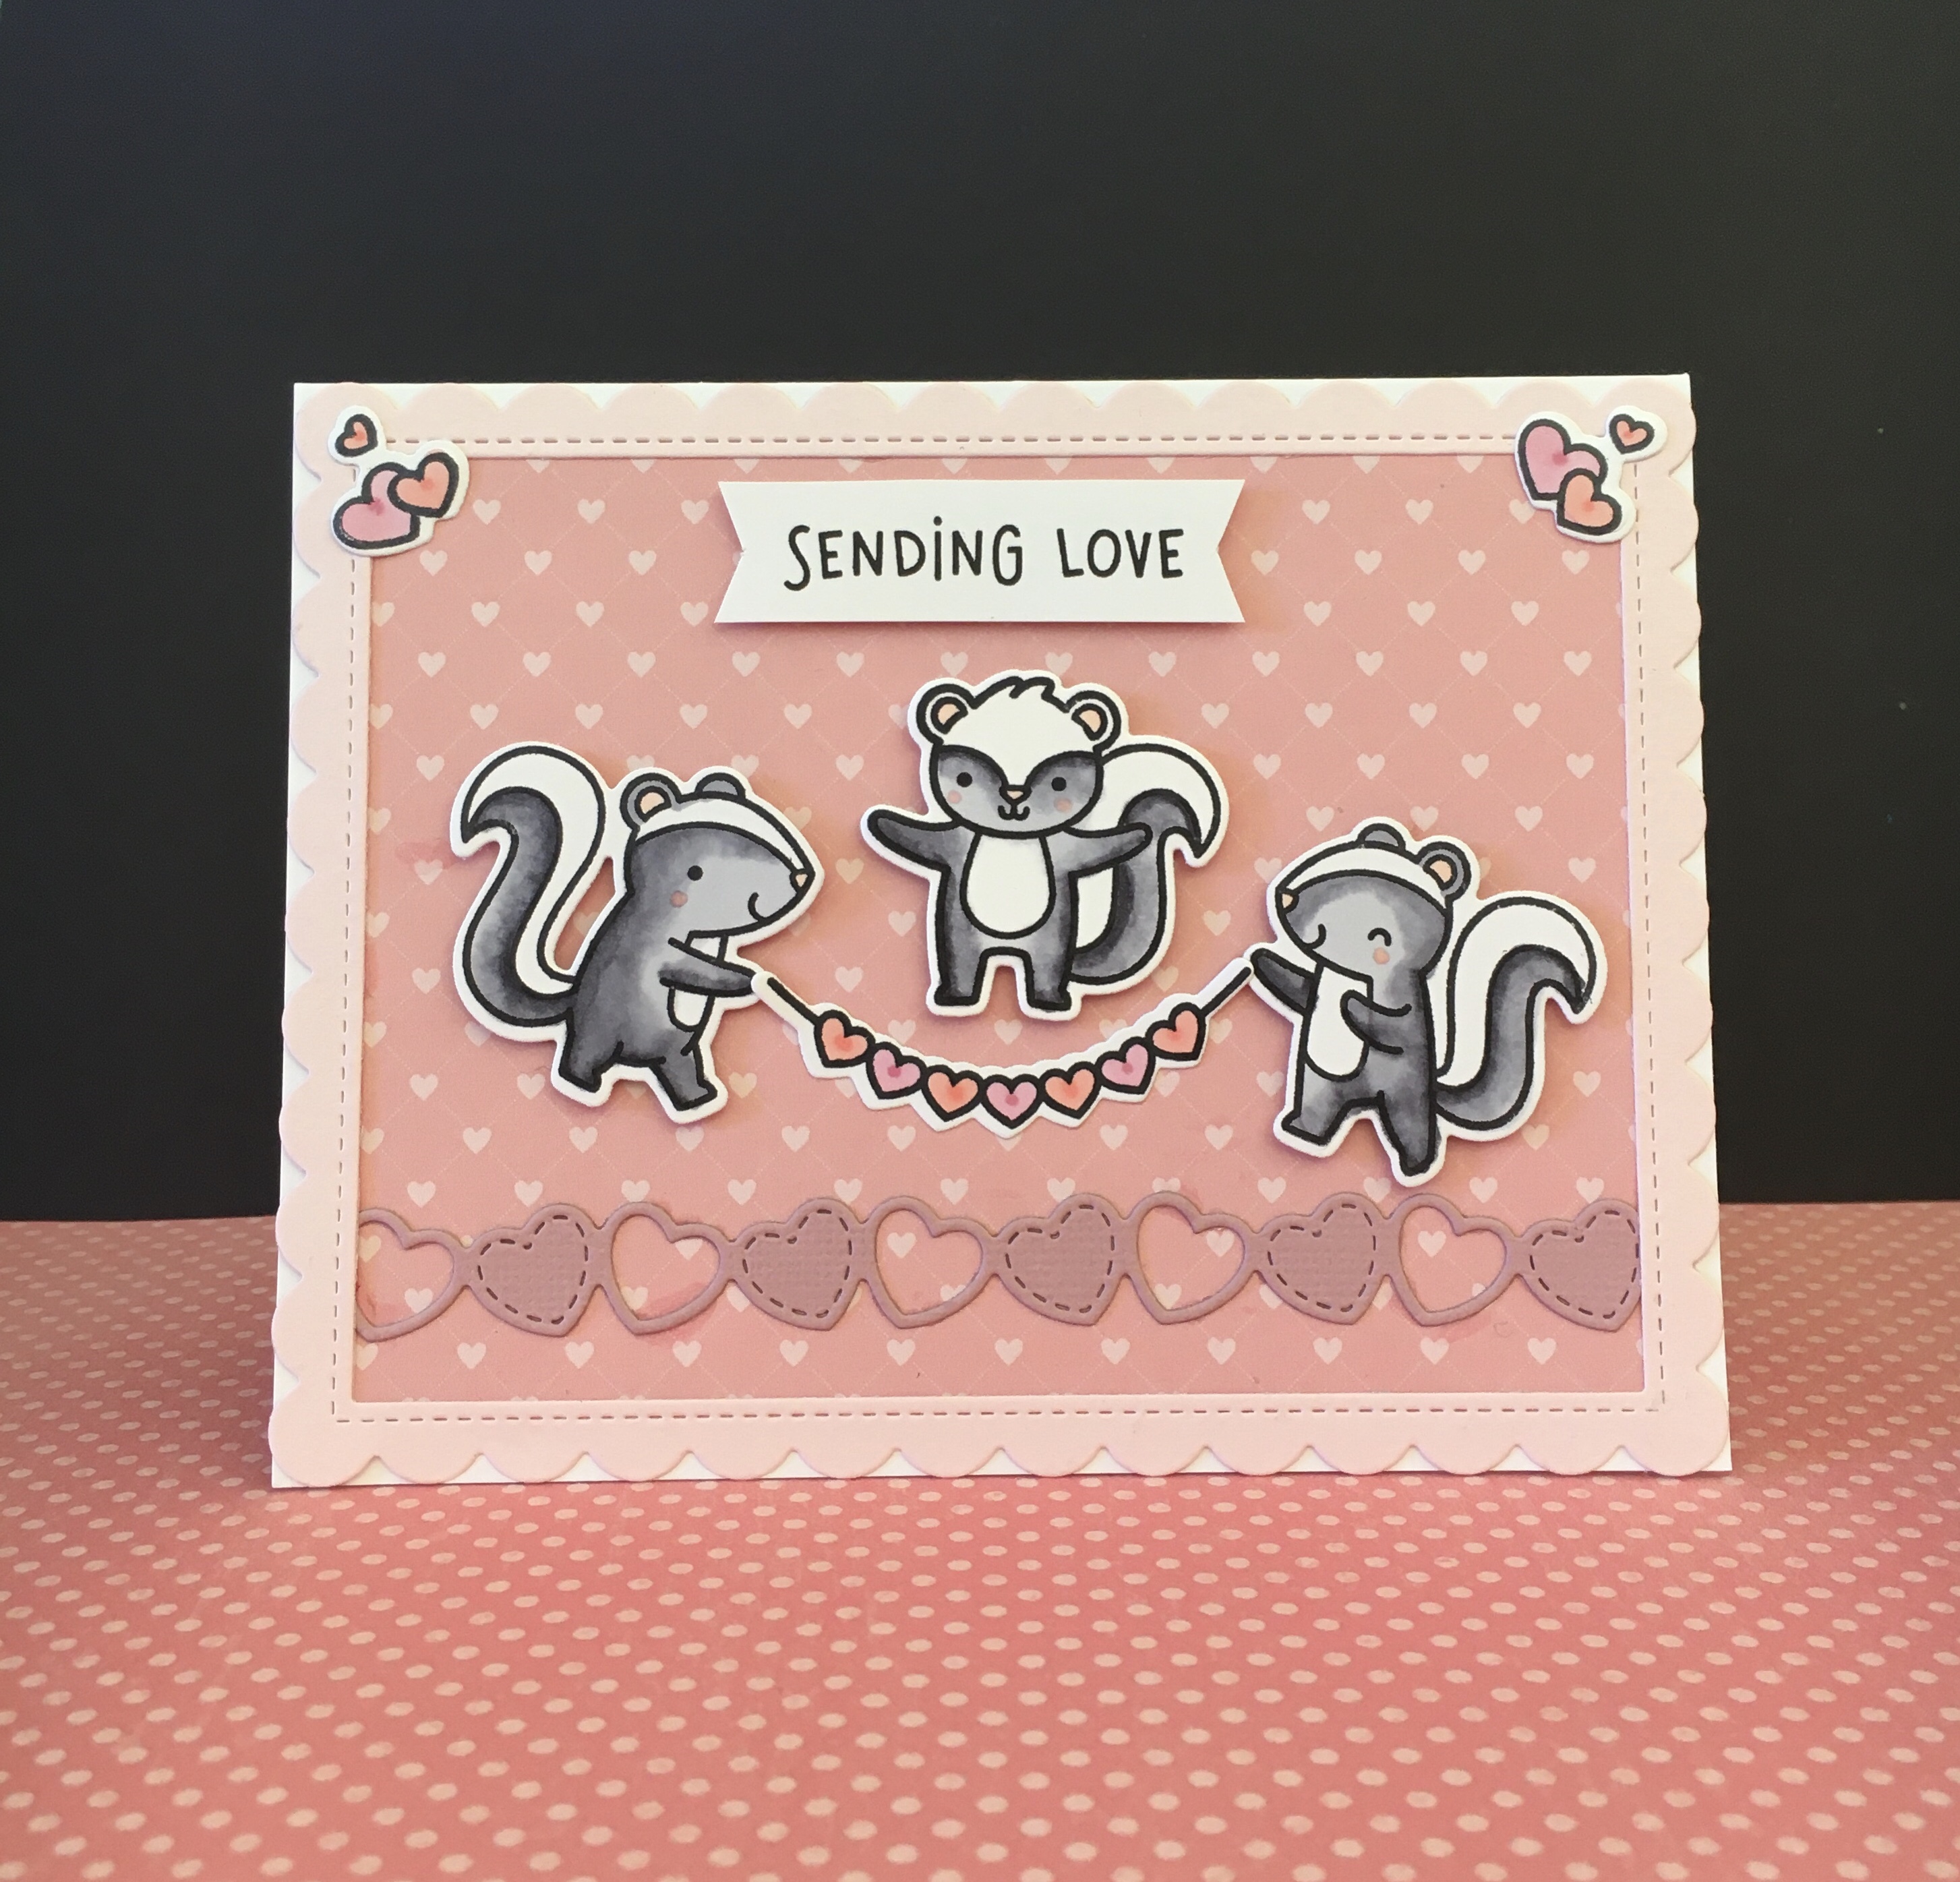
Stud Puffin stamps (for Sending Love sentiment)
Stitched Hillside Borders die set
Valentine Hearts Border die set
Stitched Scalloped Rectangle Frames die set
Grassy Hillside Borders die set
Patterned papers:
Echo Park Hello Valentine Collection – Be Mine Bouquet and Special Delivery
American Crafts papers – 348946 and 359971
Translucent vellum
Cardstock
Copic markers
What better way to show you care than to share cupcakes?!
Of course, a skunk and fox would be playing together and celebrating Valentine’s Day!
We’ve got some skunk roping happening here.
Some critters are speed demons on their scooters; others prefer to rest on the sidelines!
We’ve got all kinds of happy here with a lovable skunk and fox.
Thanks for stopping by today. I really got into the card-making zone during the past few days. I hope you’ve enjoyed this little collection.
I know it has been way too long since I’ve posted here. I spent December carving stamps for the #carvedecember challenge on Instagram. I’ll be creating a blog post about my hand-carved stamps soon. Today I’m back to share some cardmaking.
Supplies
Stamps and dies by Lawn Fawn:
Scent with Love stamps and die sets
Scent with Love Add-on stamps and die sets
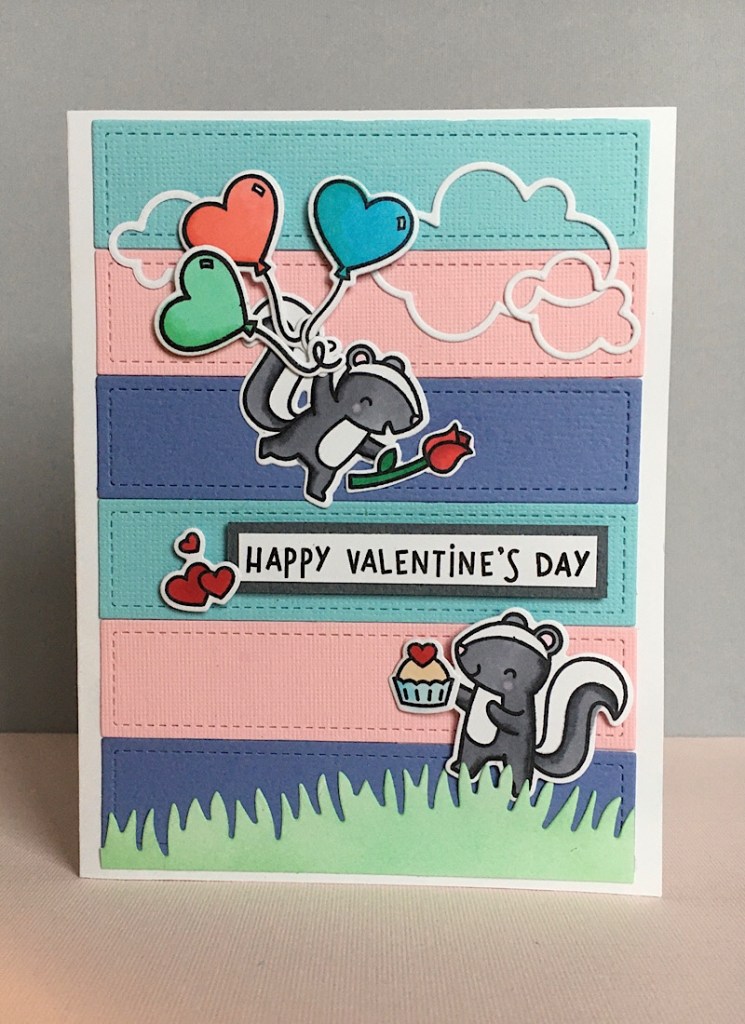
Small Mini Slimline Stackables die set
Simple Puffy Cloud Frames die set
Grassy Hillside Borders die set
This card was so much fun to create! As soon as I saw the Small Mini Slimline Stackables die set, I saw so many possibilities! So for this card, I cut the smallest in the set in three colors and covered the card base for a fun background. The colors I chose were not necessarily traditional for a Valentine. From there I created a scene with the cute skunks in the Scent with Love and Scent with Love Add-on sets with clouds and grass from other die sets in my stash. There’s very little better than cute critter stamps, and Lawn Fawn always comes through for me!
I colored all of the stamped and die-cut elements with Copic markers. I blended the die-cut grass with Cracked Pistachio Distress Ink.
Patterned paper – Doodlebug Springtime Collection: 4128 Chickies
Cardstock
Copic markers
Lawn Fawn Glitter Pen
I colored the stamped images with Copic markers and added some glitter with the Lawn Fawndamentals glitter pen, which gave the eggs a nice sparkle. The jelly bean pattern on the paper picked up the colors I used in the scene. I liked how the scalloped edge on the frame repeated the same pattern as the edge of the Easter basket. It was fun to put together this scene for some Easter cheer. Thanks for stopping by.
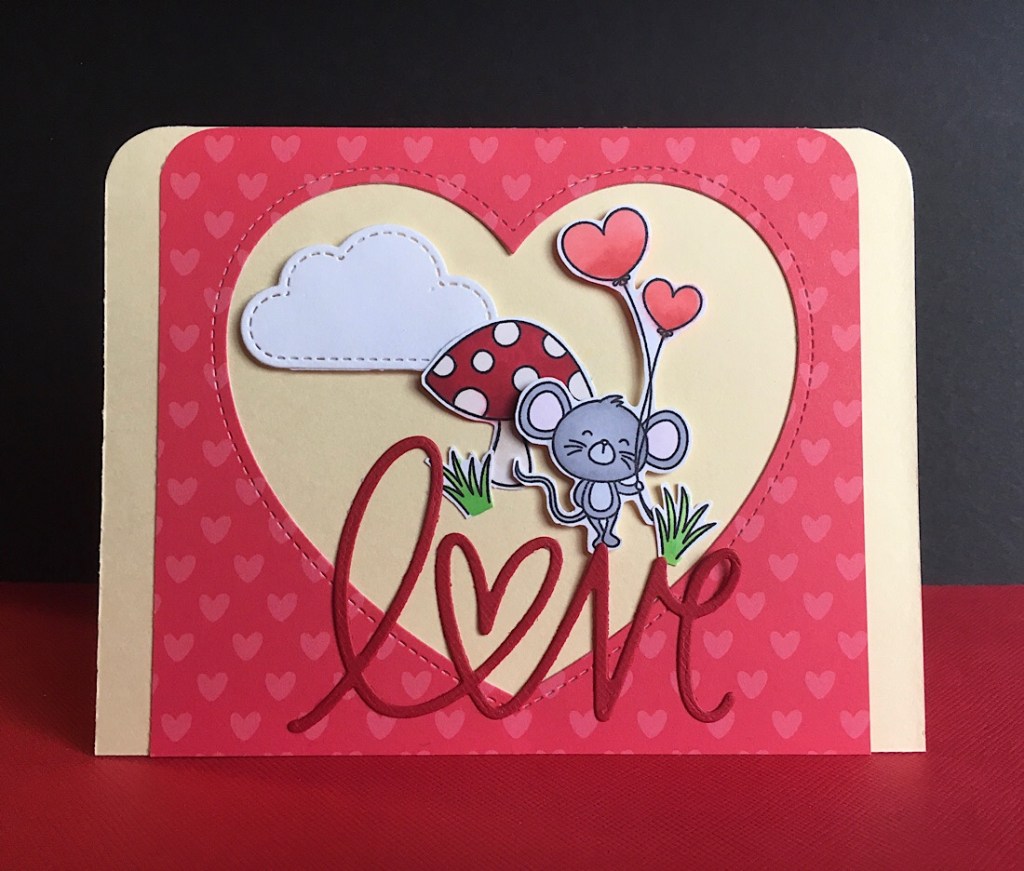
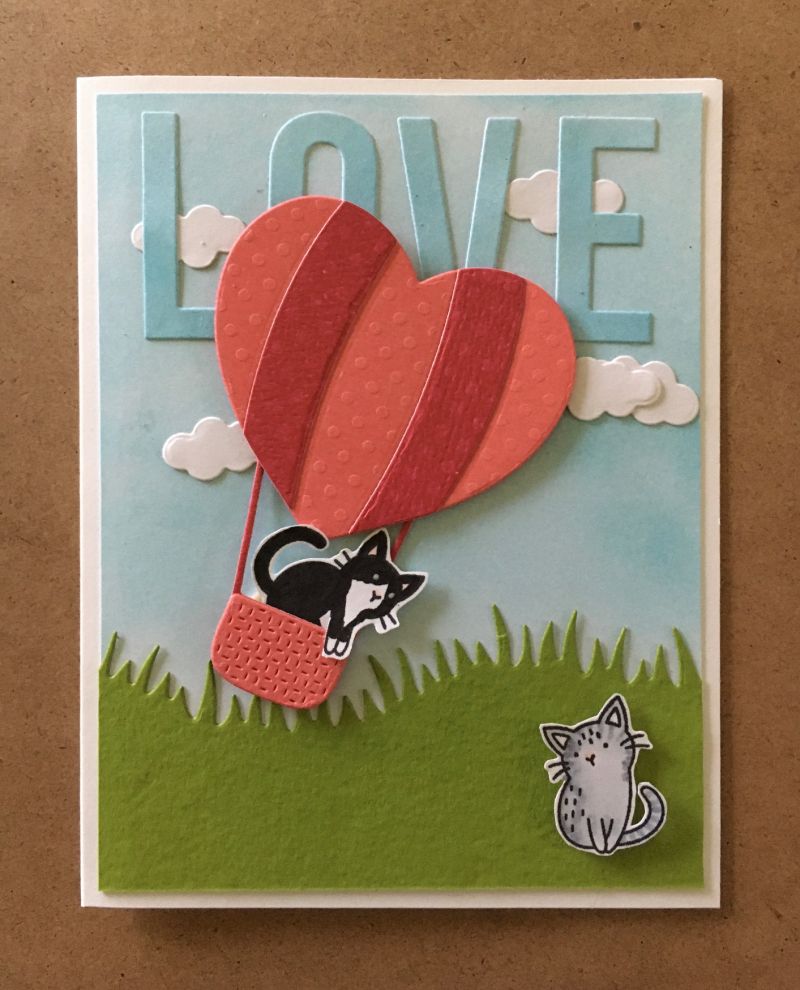
Dies – My Favorite Things – Heart Air Balloon, Huge Love; Lawn Fawn – Grassy Hillsides Borders
Stamps – My Favorite Things – Mini Meows
Ink – Ranger Distress Ink – Broken China
Copic Markers
Cardstock – Bazzill and BoBunny
Well, I’m very late in posting my Valentines. We had an ice storm here in the Willamette Valley on February 12th (freezing rain that accumulated to over an inch on everything) that caused lots of tree and power line damage. Our power was out for almost 8 days and I had very spotty internet access, so I didn’t even try to post anything during that time. I’m still catching up on things and adjusting to being able to turn on real lights! We were very fortunate here compared to many across the country who had much worse circumstances. But we did enjoy Valentine’s Day under different conditions with a grilled dinner!
So now on to the card. I have always loved hot air balloons and as soon as I saw this die set at our local store, I had to have it! I inked the background with Distress ink and inked some additional paper a little darker to use to die cut the LOVE sentiment. The little clouds were part of the Heart Air Balloon die set, so I cut some of those for the sky. Once I assembled the balloon and inserted cat 😉 I popped it up so it would look like it was floating. I colored the kitties with Copic markers in the colors of our two cats (Max in the balloon and Sissy on the ground). They are not exactly in love in real life, but we’ll just go for that effect for purposes of the Valentine! I really had fun making and giving this card (I made one for my husband and one for my son). Thanks for stopping by. Better late than never!
I usually procrastinate in making Christmas cards in a timely manner, but my friend Barb challenged an online group of us to make a card with a poinsettia and I thought I should join in! I was sort of surprised that with all of the stamps I own, this set is the only one I found that had poinsettias, and it had two different ones.
Supplies used:
~ Stamps: Stampers Anonymous Tim Holtz Collection – Yuletide Gatherings CMS390 (poinsettia) and Modern Christmas CMS388 (sentiment)
~ Authentique Magical Collection – Magical Five
~ Karin Brushmarker Pro markers
~ Metallic gold watercolor and gold twine
I have been wanting to test out the Karin Brushmarkers direct to the rubber stamp and this one was a great candidate. These markers are great for watercolor and have a brush tip, so they are perfect for applying color to a rubber stamp. For this one, I didn’t spritz the stamp with water before or after, and the image came out very nice and crisp. I was able to get three more impressions after this by adding water to the stamp. Here is how they looked:
So depending on the look you’d like to achieve, you can get a lot of impressions from one ink application, which is potentially a big time saver. As a result of this experiment, I have several images to work with for more cards. Always a plus!
This is my most elaborate Halloween card this year. I’m not sure exactly what happened, but time got away from me and I just didn’t make many. I created this one for a swap that I participated in. We were to make a Halloween card that was a fun fold that the recipient could use for a decoration.
I had fun putting together several different Lawn Fawn stamp/die sets and patterned papers from different companies for a spooky night-time scene. I decided on a Z-fold card, and the beauty of this design is that it can stand up on its own but it folds up to easily fit into an envelope.
Supplies:
Lawn Fawn stamps and dies – Spooktacular, Hoppy Halloween, and Fox Costumes Before ‘n Afters and the Spooky Fence Border die
Papers – Authentique – Mysterious and Twilight collections, and Echo Park Bewitched collection (for the starry sky)
I colored the critters with Copic markers and backed the card with and cut the fence border from black cardstock.
This was very fun and quite easy to make. Have a Happy Halloween!