Patterned papers – Echo Park “Bewitched” and “Halloween Magic” collections
Die – Little B – Circles
Sequins – Hero Arts
Cardstock – Bazzill
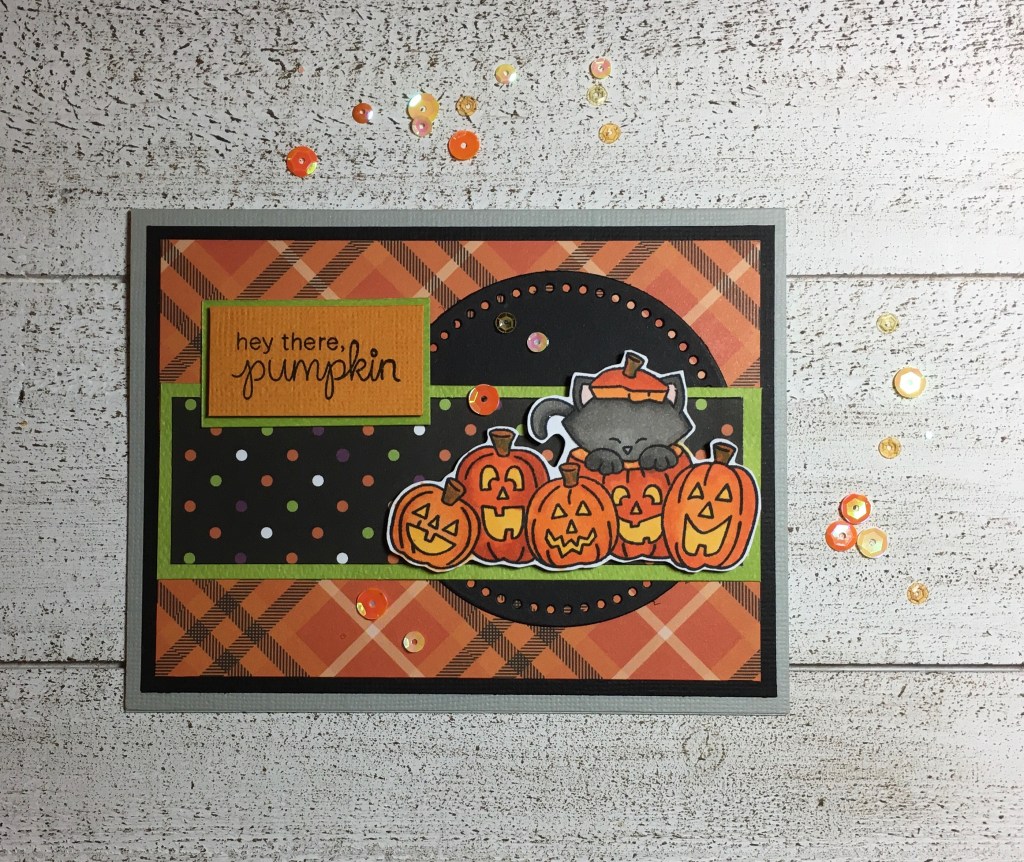
I stamped several Newton’s Nook images out recently for Halloween cards. The images are so cute! I colored this one with Copic markers and fussy-cut it out. I have so many fun Halloween papers, I just got some out and started playing with ideas. I decided on the plaid background and then I wanted some dots for contrast. I like repeating the dots/circles, so I added a circle die-cut and round sequins for some more interest. I kind of like the design I ended up with, so I may need to remember it for future cards!
I attended a virtual card-making retreat recently and learned how to make this card. All of the classes were online and it gave me the opportunity to attend something that I would not have been able to do in person, so it was very nice.
The instructor for this card (and some others I haven’t made yet) was Gina Krupsky (aka Gina K) and we used Gina K Designs stamps, masking paper, inks and dies to create the card. Masking areas with their Masking Magic kept each ink color discrete, each quadrant clean and made the entire card come together seamlessly.
The stamps and dies we used have not been released yet, so I do not have the names of the sets.
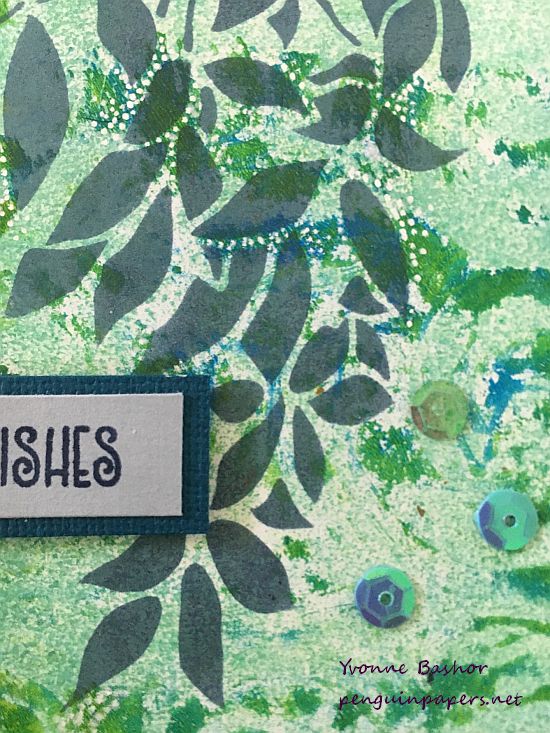
Stencil – The Crafter’s Workshop TCW2300 Slimline Gentle Leaves
Stamp – Miss Ink Stamps – Everyday Sentiments
Posca pen – white
Acrylic paints, gel plate, archival ink
Sequins – Buttons Galore
I make lots and lots of gel prints! I like to participate in printing challenges, I teach gel printing classes and make many samples for classes, and I just love to grab a gel plate or two and experiment with inks, paint and textures. So each time I set out to make a few prints, it can end up to be many that I don’t have time to use at that very moment. So needless to say, I have a lot of potential card backgrounds available in my stash.
For this mixed media card, I grabbed a print that was already card base sized. It had interesting texture, but needed a focal point. I had this new stencil by The Crafter’s Workshop that I hadn’t used yet, so I didn’t hesitate to use it with some archival ink to add a design that worked very well with my gel print. I am always a fan of botanical designs. I wanted to make sure the stenciled design was clear on the print, so I added a bunch of dots with a white Posca paint pen. This added even more texture but added enough contrast that the leaves were better defined. Adding a stamped sentiment and some sequins made it an easy to complete the card.
Doodlebug Design Inc. – Party Time 6″ X 6″ paper pad
Ranger Distress Ink – Wild Honey (for edging)
Copic markers
Foam adhesive
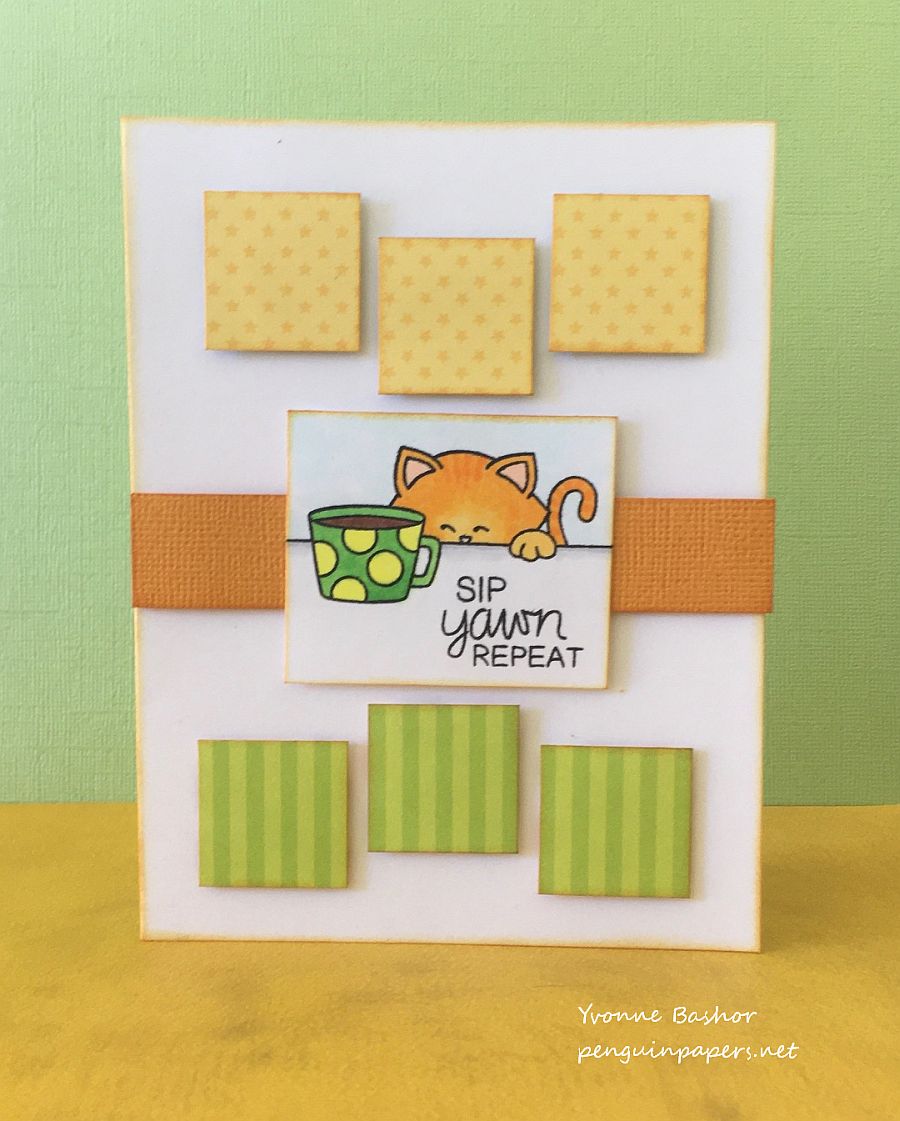
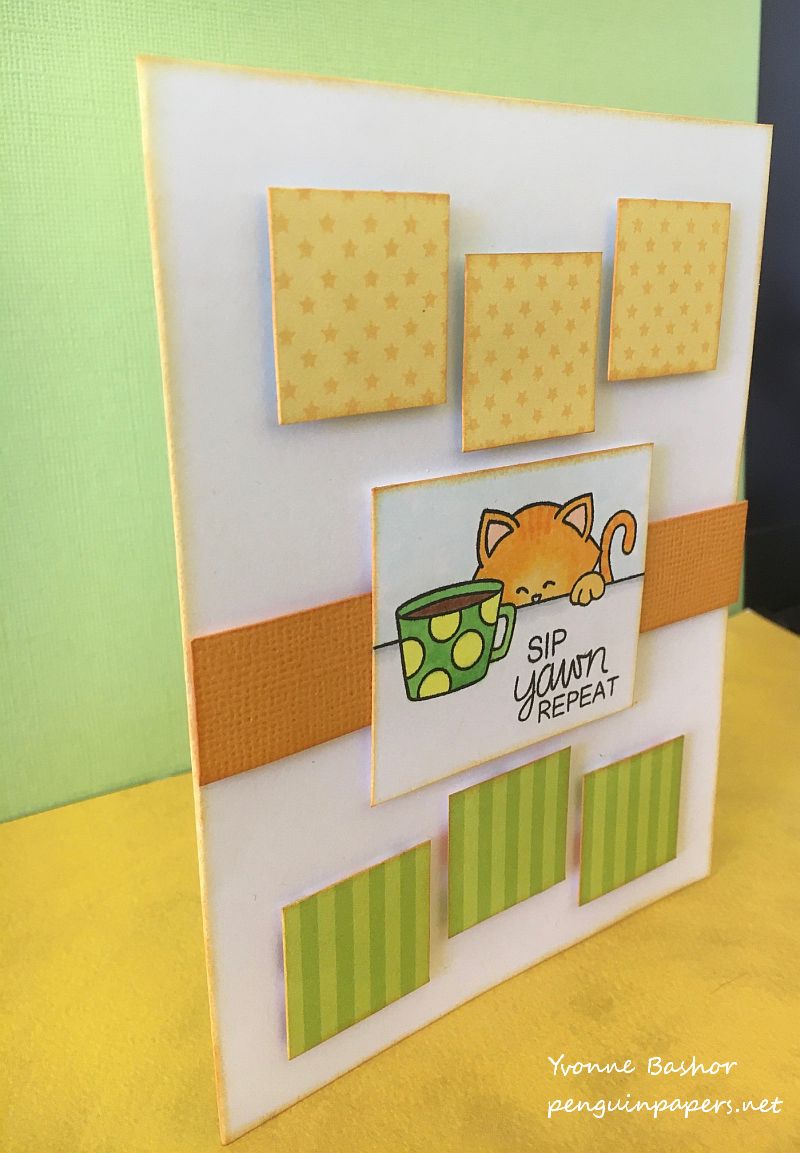
A group of my online cardmaking friends had a challenge this weekend to make coffee cards. This was the stamp set I thought of and one of my favorite stamps. Newton the cat is just so cute in this stamp! Those who know me well, know that I enjoy a couple of cups of coffee in the morning. I’ve never been a morning person, but I can cope with caffeine!
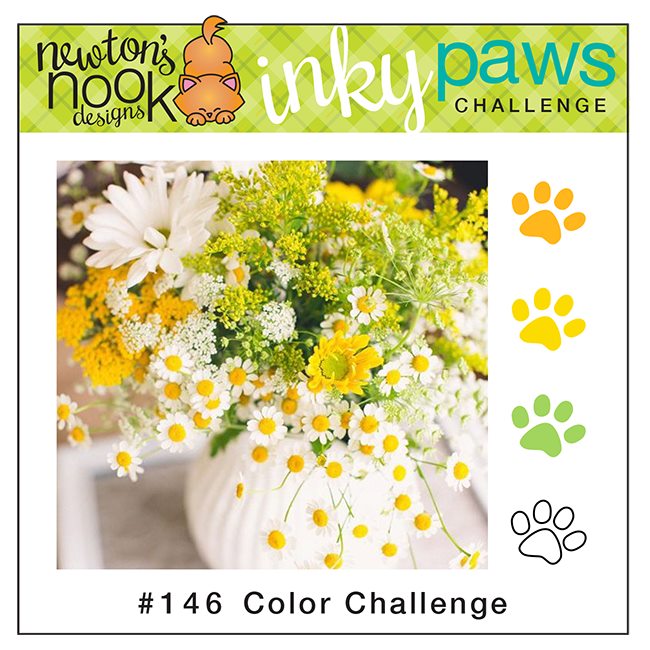
For this card, I colored my image with Copic markers to pick up on the Inky Paws challenge color palette (yellow, orange, green and white) in the current Inky Paws challenge and then found some cute patterned papers in my stash to match. I cut “inchies” from the papers and arranged them and popped them up to create a simple design, which is what I’m drawn to. I inked the edges of every element with Wild Honey Distress Ink to bring it all together.
Below you can see the dimension I created with foam adhesive.
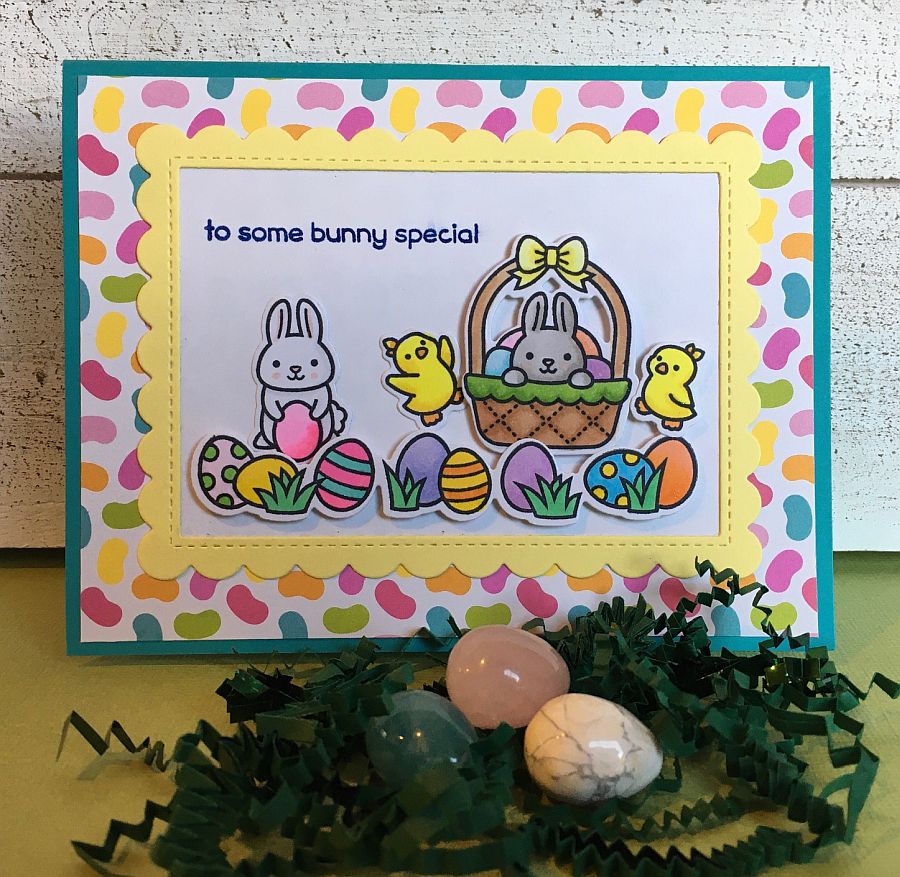
Patterned paper – Doodlebug Springtime Collection: 4128 Chickies
Cardstock
Copic markers
Lawn Fawn Glitter Pen
I colored the stamped images with Copic markers and added some glitter with the Lawn Fawndamentals glitter pen, which gave the eggs a nice sparkle. The jelly bean pattern on the paper picked up the colors I used in the scene. I liked how the scalloped edge on the frame repeated the same pattern as the edge of the Easter basket. It was fun to put together this scene for some Easter cheer. Thanks for stopping by.
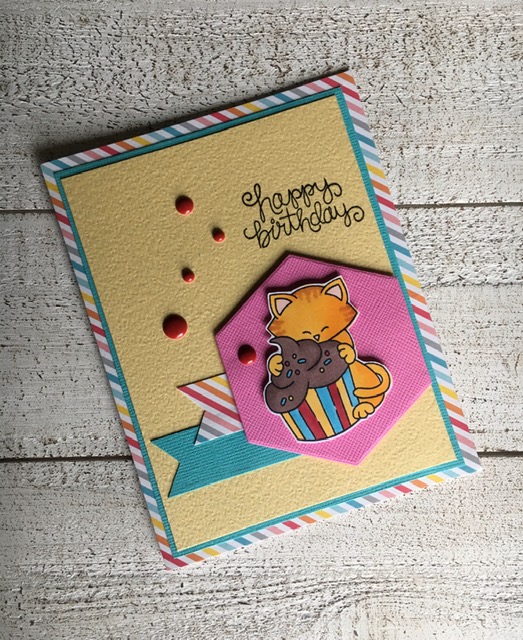
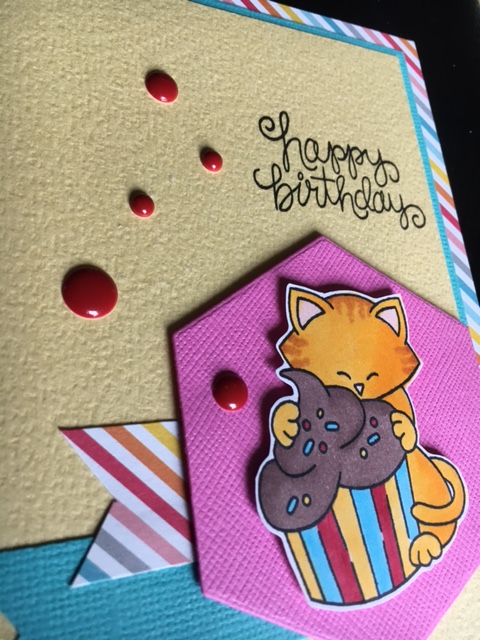
I participated in the *virtual* Crop on the Cape, hosted by Jenn Shurkus, last weekend. I always enjoy Jenn’s “Creative Chick” online classes and am always happy to support creative small businesses who have certainly been impacted during the last year. I highly recommend her classes. There were lots of demos and challenges during the three days which made it lots of fun. I created this card for one of the challenges that was based on a color scheme and group of photos for inspiration. I had this Newton’s Nook stamp set in my stash and decided to use the current sketch provided for the Inky Paws Challenge on the Newton’s Nook blog to make some birthday happiness.
I colored the kitty and cupcake with Copic markers. The Happy Birthday sentiment is part of the same stamp set, along with some other cute images and sentiments. I kept the card simple with just a little dimension added to the hexagon and some epoxy stickers (I love that shiny texture on a card!) to finish it off. Thanks for visiting.
Dies – My Favorite Things – Heart Air Balloon, Huge Love; Lawn Fawn – Grassy Hillsides Borders
Stamps – My Favorite Things – Mini Meows
Ink – Ranger Distress Ink – Broken China
Copic Markers
Cardstock – Bazzill and BoBunny
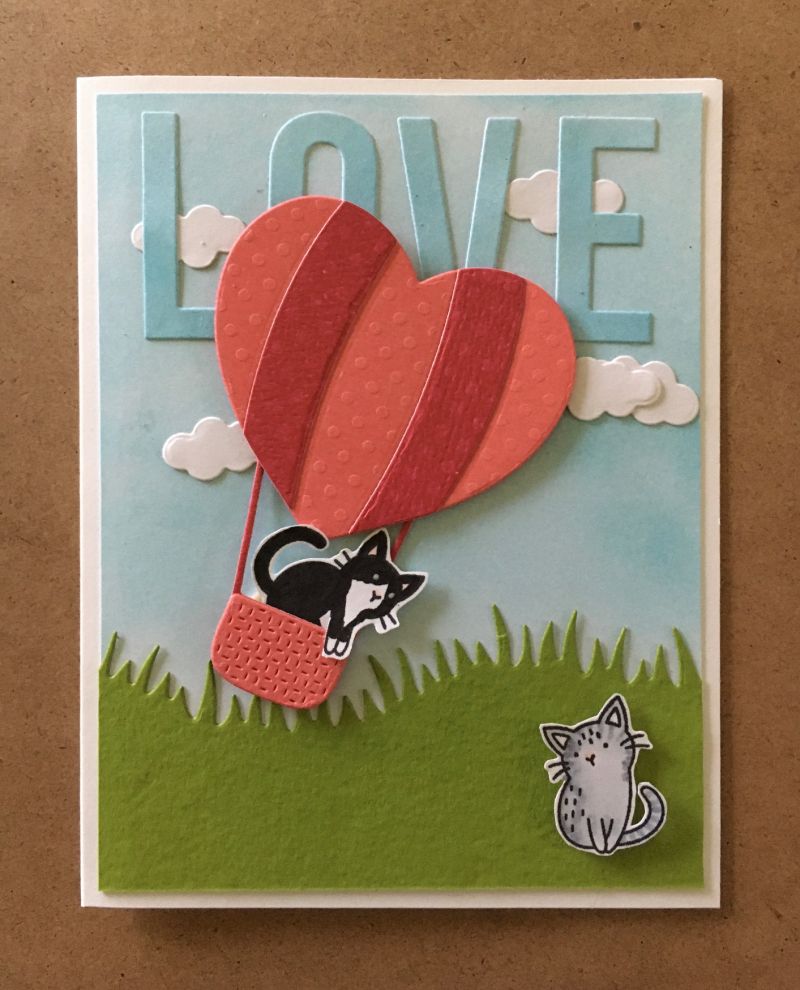
Well, I’m very late in posting my Valentines. We had an ice storm here in the Willamette Valley on February 12th (freezing rain that accumulated to over an inch on everything) that caused lots of tree and power line damage. Our power was out for almost 8 days and I had very spotty internet access, so I didn’t even try to post anything during that time. I’m still catching up on things and adjusting to being able to turn on real lights! We were very fortunate here compared to many across the country who had much worse circumstances. But we did enjoy Valentine’s Day under different conditions with a grilled dinner!
So now on to the card. I have always loved hot air balloons and as soon as I saw this die set at our local store, I had to have it! I inked the background with Distress ink and inked some additional paper a little darker to use to die cut the LOVE sentiment. The little clouds were part of the Heart Air Balloon die set, so I cut some of those for the sky. Once I assembled the balloon and inserted cat 😉 I popped it up so it would look like it was floating. I colored the kitties with Copic markers in the colors of our two cats (Max in the balloon and Sissy on the ground). They are not exactly in love in real life, but we’ll just go for that effect for purposes of the Valentine! I really had fun making and giving this card (I made one for my husband and one for my son). Thanks for stopping by. Better late than never!
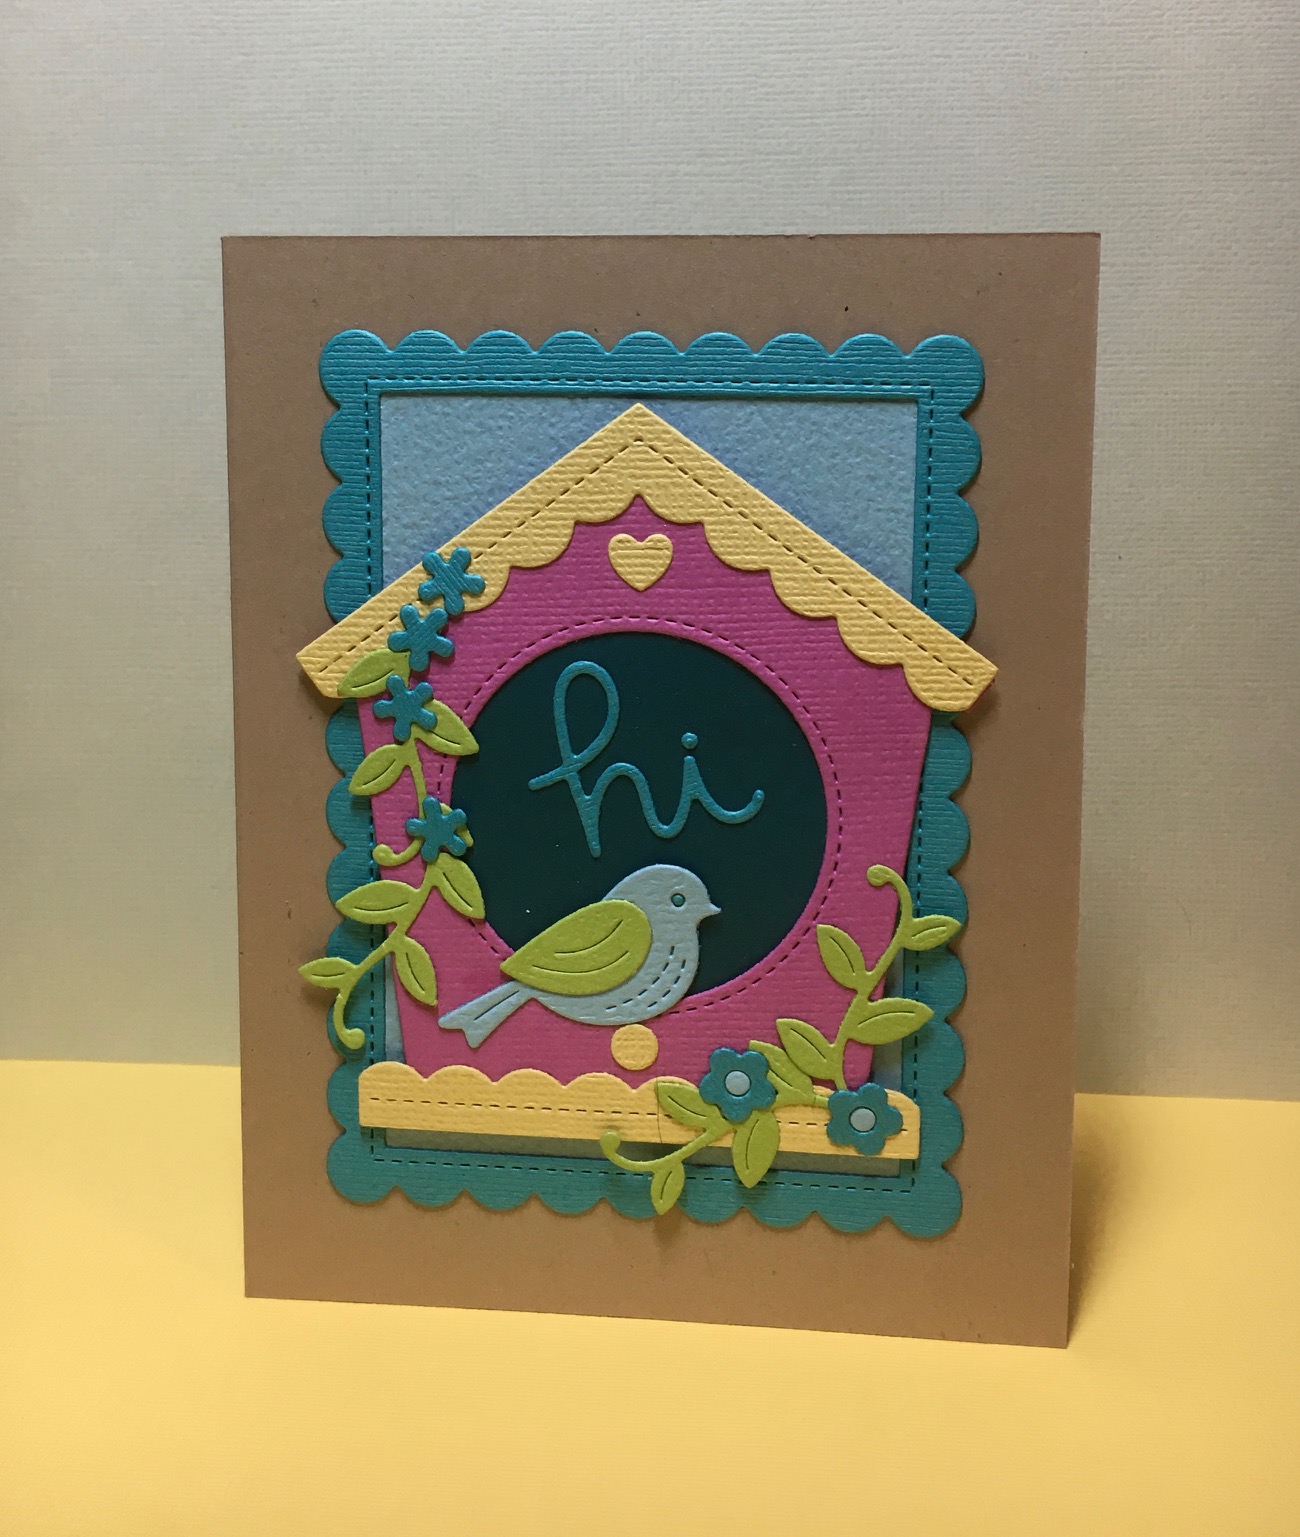
I’m jumping ahead to Spring for a short visit! We’ve had rain, hail and sunshine this first week of February here in the Willamette Valley (and the Groundhog did not see his shadow). So here is a cheerful birdhouse made completely with Lawn Fawn dies. I decided to die cut all of these pieces in lots of happy colors and do some mixing and matching. This card had absolutely no stamping either. That doesn’t happen very often.
Supplies:
Dies – Lawn Fawn Magic Iris Birdhouse Add-On, Stitched Scalloped Rectangle Frames and Outside In Stitched Bubbles (for the “hi.”)
Cardstock in a variety of colors, plus Kraft for the card base
I plan to make more of these with some other color combinations and also to make a version with the Magic Iris die in the birdhouse opening for a little interactive fun. Thanks for stopping by.
I usually procrastinate in making Christmas cards in a timely manner, but my friend Barb challenged an online group of us to make a card with a poinsettia and I thought I should join in! I was sort of surprised that with all of the stamps I own, this set is the only one I found that had poinsettias, and it had two different ones.
Supplies used:
~ Stamps: Stampers Anonymous Tim Holtz Collection – Yuletide Gatherings CMS390 (poinsettia) and Modern Christmas CMS388 (sentiment)
~ Authentique Magical Collection – Magical Five
~ Karin Brushmarker Pro markers
~ Metallic gold watercolor and gold twine
I have been wanting to test out the Karin Brushmarkers direct to the rubber stamp and this one was a great candidate. These markers are great for watercolor and have a brush tip, so they are perfect for applying color to a rubber stamp. For this one, I didn’t spritz the stamp with water before or after, and the image came out very nice and crisp. I was able to get three more impressions after this by adding water to the stamp. Here is how they looked:
So depending on the look you’d like to achieve, you can get a lot of impressions from one ink application, which is potentially a big time saver. As a result of this experiment, I have several images to work with for more cards. Always a plus!
This is my most elaborate Halloween card this year. I’m not sure exactly what happened, but time got away from me and I just didn’t make many. I created this one for a swap that I participated in. We were to make a Halloween card that was a fun fold that the recipient could use for a decoration.
I had fun putting together several different Lawn Fawn stamp/die sets and patterned papers from different companies for a spooky night-time scene. I decided on a Z-fold card, and the beauty of this design is that it can stand up on its own but it folds up to easily fit into an envelope.
Supplies:
Lawn Fawn stamps and dies – Spooktacular, Hoppy Halloween, and Fox Costumes Before ‘n Afters and the Spooky Fence Border die
Papers – Authentique – Mysterious and Twilight collections, and Echo Park Bewitched collection (for the starry sky)
I colored the critters with Copic markers and backed the card with and cut the fence border from black cardstock.
This was very fun and quite easy to make. Have a Happy Halloween!