Tag Archives: Gelli Plate

World Cardmaking Day 2020

In my constant endeavor to find something positive in this highly unusual (okay, CRAZY!) year, at least we have a day dedicated to making cards! Right? So I spent today making a few gel plate prints and then I made three cards with some of them. Here’s what I did.

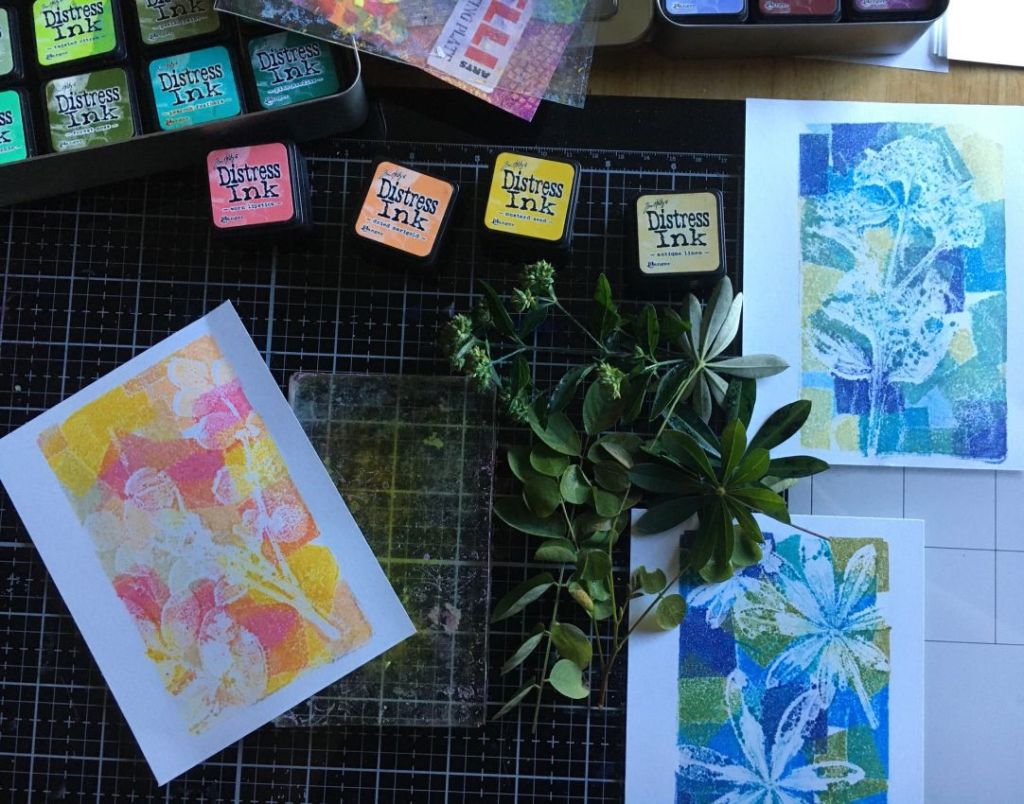
Above you can see the prints I made, using leaves from plants growing in my yard. Nothing exotic, to be sure! The difference in this gel printing experiment is that I used mini Distress Ink cubes direct to the gel plate to create kind of a geometric pattern. I didn’t brayer the ink out, but left it for a more distinct pattern.

I then placed the leaves on top of the inked plate and then pressed the paper over. Then I removed the paper and the leaves and replaced the paper, lining the paper onto the plate as it was before. This partially defined the leaves with remaining ink.

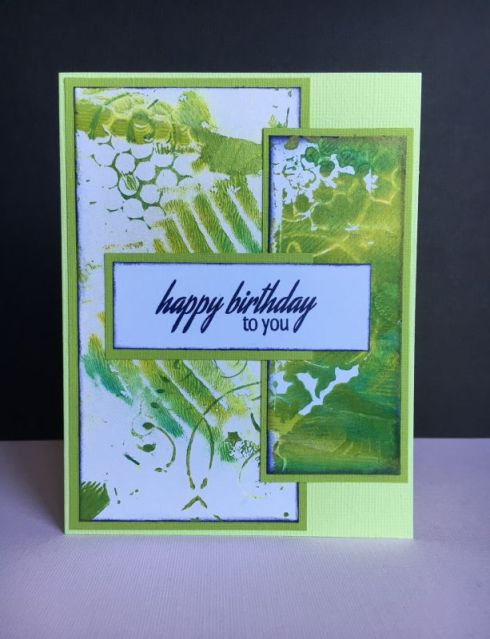
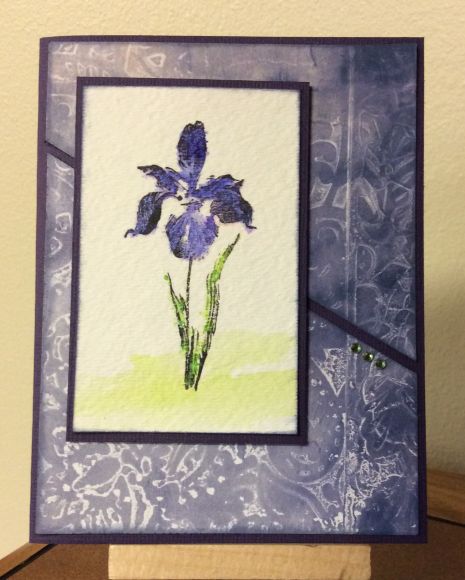
Here are the cards I made from the prints seen above.

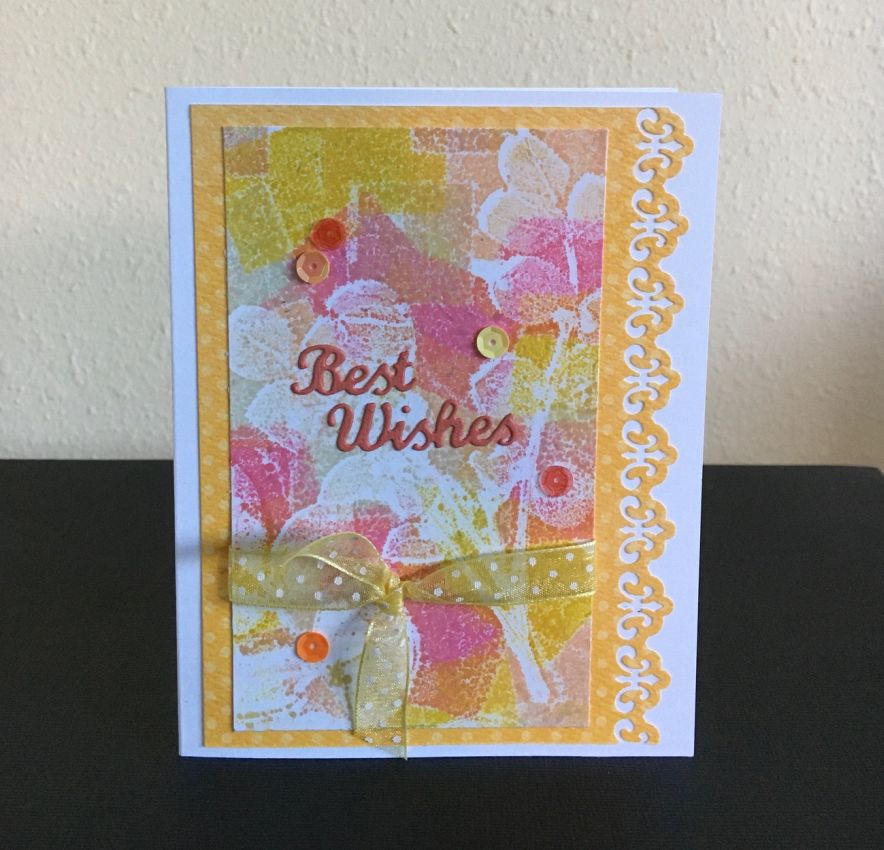
I used sentiment dies respectively, from Sizzix, Elizabeth Craft Designs, and My Favorite Things. I layered the prints with cardstock and added some sequins. The center card also has ribbon and a border made with an EK Success “Fleur de Lis” border punch. I definitely shopped my stash with these cards!

Thanks for stopping by and Happy World Cardmaking Day!


Gel Print Birthday Cards

  • Gel prints from my stash (using acrylic paint, stencils, found objects)
  • Stamp – Altenew “Fresh Freesia”
  • Cardstock – Bazzill
  • Ink – VersaFine Clair “Medieval Blue”
  • Sheer Shimmer Spritz – Gold – Imagine Crafts

I created these cards using scraps of gel prints that I printed long ago. I used stencils when I made the prints used in the first card, one is from The Crafter’s Workshop called “Aboriginal” (the smaller panel) and the other is a stencil I borrowed and I can’t determine the company who produced it. I also spritzed the final card with some sheer gold spray for a little shimmer. The second card featured green gold acrylic paint, so it already had a pretty gold metallic look. I have many, many prints in my stash because I’ve taught classes in printing and done it on my own so I have lots to play with as a result. Some I use in my art journals, but I have been enjoying using them in cards lately. For both cards, after I cut them into panels I edged them in a darker ink to “finish” them nicely. I also matted the pieces with cardstock and added the birthday sentiment. Thanks for visiting today.

Challenge: Hiding in my Craft Room – HIMCR #352 – Super Scraps Saturday


Late to the party… Christmas Card!

merry_christmas_gelli

  • Dies – Simon Says Stamp – “Holiday Frames”
  • Gelli plate print
  • Patterned paper – Echo Park “Home for the Holidays: Ornaments”
  • Silver Metallic cardstock – Paper Accents
  • Cardstock – Bazzill Bling “Emerald City”
  • Sierra Pacific Crafts tinsel trim (green)

I ran out of time before Christmas to post here, so I have to catch up and show a few more Christmas cards! This is one that I made with a gelli plate print as a backdrop for this die-cut set. I layered some papers and added some pretty tinsel trim. Viola! Thanks for stopping by.


Season’s Greetings featuring Gelli print

seasons_greeting_gelli

  • Dies –
    • Spellbinders Nestabilities – Resplendent Rectangles
    • Elizabeth Craft Designs – Season’s Greetings
    • Sizzix Tim Holtz Alterations – Holiday Greens
  • Patterned paper – KaiserCraft – Christmas Carol 6-1/2″ paper pad
  • Metallic paper (red) – Paper Accents
  • Gelli Plate print

It was kind of difficult to capture this ornament accurately with all of the reflection on the red metallic die-cut. This die-cut really shines and sparkles! The background is a gelli plate print I made previously, mainly with red paint and stencils. I accented the frame with holly from the Sizzix die set. The Simon Says Stamp Wednesday Challenge is Make it Sparkle, but I hope a little shine will also fit the bill! Thanks for visiting and Happy Holidays!


Unscripted Sketches #255 – Iris Birthday

unscripted-255-rene


  • Stamp – from Penny Black “Allegro” set
  • Bling – Crystal Stickers by Mark Richards, Ltd. – Citron
  • Embossing folder – Sizzix “Tropical Paisley”
  • Cardstock – Bazzill
  • Twinkling H2Os

This is sort of a mixed media card. I used the Unscripted Sketch #255 for inspiration. I created the background from a monoprint I made using my Gelli plate. I applied some blue acrylic paint, mixed with pearl in a fairly thin layer. Then I pressed the embossing folder into the paint. I used both sides of the folder, which gives an one type of impression on the raised side and a reverse impression on the other–the difference when you emboss or impress/deboss (you can sort of see the darker color versus the lighter color). I pulled the print and used it for the background paper. iris-closeup

Then I applied Twinkling H2Os to the iris stamp and spritzed with water to get the color down, then once it was dry, I over-stamped with the same image with black archival ink. You can see a detailed look at it to your left and hopefully you can see the sheen of these Twinkling H2O watercolors. Thanks for stopping by.


Freshly Made #93 – Sleeping Kitty

FMS-93-sleepingcat-gelli-bkgrnd

  • Stamp – Magenta “Sleeping Cat”
  • Background – made with Gelli Plate – Gelli Arts – layers of acrylic paint with impressions from: Stencil Girl “Damask Waves 6” and Crafter’s Workshop “Basketweave” template
  • Cardstock – Bazzill
  • Embossing folder – Cuttlebug “Swiss Dots”
  • Ribbon – May Arts
  • Ink – Ranger Distress Ink: Seedless Preserves
  • Acrylic Paints and Ranger Distress Paint (Brushed Pewter)

I made this card using a background/monoprint I created with my Gelli Plate. This particular background consists of three separate runs to get the layers of color I wanted. Each print run used a different color(s) of paint and different imagery. I used Freshly Made Sketches Sketch #93 as inspiration for the layout of this card. Because I’ve been demonstrating mono-printing with the Gelli Plate at a local art and craft studio, I have lots of backgrounds to work with! You may see more soon. I blended some Distress Ink onto the cat image to avoid the stark white paper I had stamped it on. It worked better visually with the background that way. Thanks for visiting.