Tag Archives: cardmaking

- Stamps – Hero Arts CL887 “Color Layering Christmas Tree”
- Dies –
- Hero Arts DI095 “Stylish Stars Fancy Dies”
- Spellbinders JutRite Custom Dies “Nested Oval Medallion Labels
- Border Punch – EK Success “Zig Zag Chain”
- Patterned paper – Reminisce “Christmas Joy”
- Metallic gold papers – Printworks Elegan Paper Sampler
- Folded card – Hero Arts PS570 “Foliage Mixed Folded Cards”
- Bling – Mark Richards Metal Nailheads – Cranberry 3mm
- Inks –
- Hero Arts “Lime to Forever Green Ombre” ink pad,
- Memories “Unicorn” white pigment ink die ink pad
- Tsukineko “Delicata Golden Glitz” pigment ink pad
I made this card over a period of time, continuing to play with the “ingredients” until I felt I got it right! I layered the tree with three different ink colors. I was inspired by the current Seasons Greetings sketch at the Fusion Card Challenge site for the card design. My secret Santa just received it so I now feel like I can post it! Have a very Merry Christmas!
4 Comments | tags: cardmaking, die cuts, Hero Arts, stamping | posted in Christmas

- Patterned paper – Carta Bella “Simple Gifts” (both sides)
- Stamps – I’m pretty sure are Hero Arts sentiment stamps (I borrowed them!)
- Bling – Clear and red rhinestones
- Cardstock – WorldWin
This is a very simple card, made from patterned paper and the paper is the star. I focused on the owl image on the paper and stamped the sentiments around the owl, then added a border from the reverse side of the paper. I finished it up with some bling and that is it! I created this during some time spent doing demonstrations in our local paper arts store, Runaway Art and Craft Studio. Thanks for visiting.
2 Comments | tags: cardmaking, carta bella, fauna | posted in Christmas

- Stamps and Dies – Lawn Fawn “Joy to the Woods”
- Patterned paper – Carta Bella “Merry Alphabet”
- Die – Spellbinders Nestabilities – Large Standard Circles
- Red cardstock
- Navy speckled cardstock
- Copic Markers
I colored the stamped trees, fox, star and ornaments with Copic markers and created a Wintry little scene in the circular opening. The navy cardstock has specks that look a little like distant stars or SNOW as a backdrop for the large die-cut star. This is an entry for the Paper Players Challenge #274 “Let it Snow.” Thanks for stopping by.
1 Comment | tags: cardmaking, copics, fauna, lawn fawn, spellbinders, stamping | posted in Challenges, Christmas, Paper Players, Winter

- Stamps: All Hero Arts
- CL469 – Swirl Christmas
- CL 887 Color Layering Christmas Tree
- Gemstones – Hero Arts – Baby Blue and Clear
- Die – Spellbinders Nestabilities “Fancy Tags”
- Distress Inks: Broken China and Tumbled Glass
- Ombre Ink – Hero Arts – Pool to Navy
- Neenah Solar White cardstock
I created this card for a 90-minute challenge I participated in with my Flickr Hero Arts group last weekend. The challenge, called a scramble, was to put together a holiday/Winter card using tiny stamps and it has to be completed and posted within 90 minutes. I’m pretty slow to complete my cards, so doing these are always very challenging for me! But I did it! I created the background by applying the two Distress Ink colors with an foam ink applicator and then spattered it with water. Once dry, I stamped the snowflakes and swirls (from two different clear stamp sets) with the ombre ink pad. I die-cut the label and stamped the sentiment from the CL887 set and popped it up with dimensional adhesive. I added a gemstone to the center of each snowflake for a little sparkle.
I was able to also play along in the Paper Players Challenge #273 with this card. This challenge is a TIC-TAC-TOE puzzle and I picked the three items from the top left to the bottom right diagonally shown on the puzzle board: Snowflake-Sparkle-Die-cut! Perfect! Thanks for visiting.
2 Comments | tags: cardmaking, die cuts, distress techniques, Hero Arts, spellbinders, tim holtz | posted in Challenges, Christmas, Distress Techniques, Paper Players, Winter

- Dies:
- Spellbinders “Foxy” and Labels One”
- Simon Says Stamp “Thanks”
- Metallic Gold cardstock
- Ranger Distress Inks – Mermaid Lagoon, Cracked Pistachio, Squeezed Lemonade, Spiced Marmalade, and Picked Raspberry
- Doodlebug sequins
- Cardstock – Bazzill
First, I created the multi-colored background by painting with Distress Inks and water, and then spritzed it with a little more water to get some nice spots! Then I die-cut it and the fox and sentiment and put them altogether. I unified it with more metallic gold by adding the sequins. I mounted the pieces on black to make the colors pop. The Shopping our Stash Challenge #228 is Thanks, which appropriate since Thanksgiving is just a couple of days away. Thanks for stopping by and have a Happy Thanksgiving!
2 Comments | tags: cardmaking, die cuts, distress techniques, Ranger, Simon Says Stamp, spellbinders, watercolor | posted in Challenges, Distress Techniques, Shopping Our Stash, Thank You

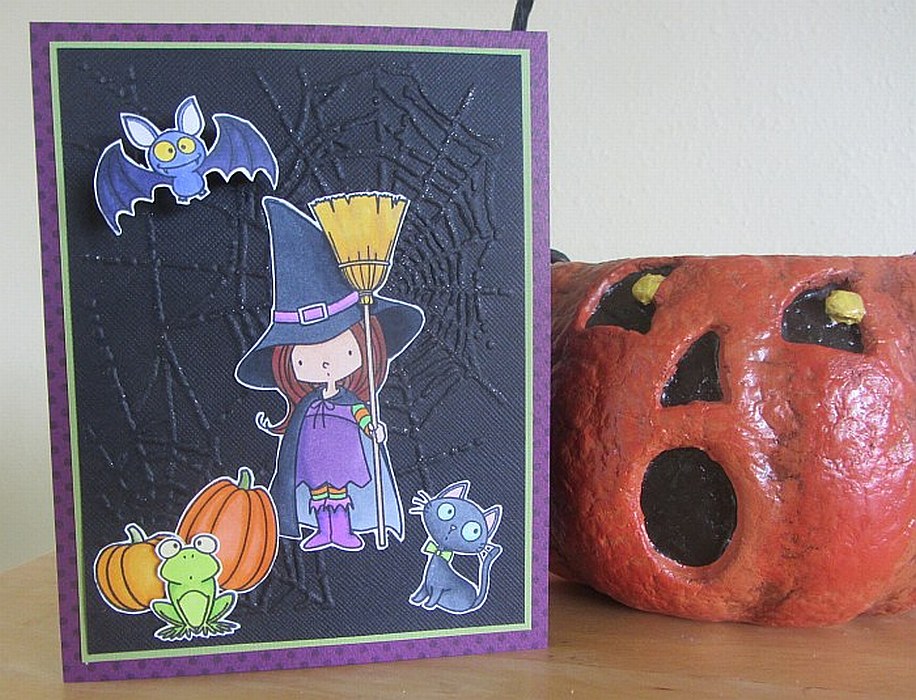
- Stamps – My Favorite Things “Witch Way is the Candy” clear stamp set
- Embossing folder – Sizzix Texture Fades – Tim Holtz “Cobwebs”
- Copic markers
- Wink of Stella
- Cardstock – Bazzill and BoBunny
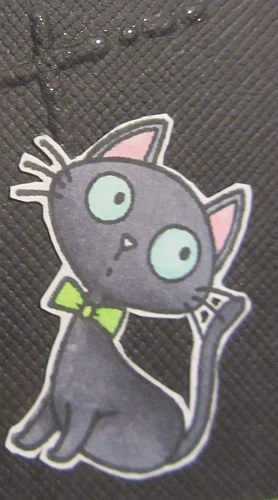
I really enjoyed coloring these stamped images! The little animals are so cute. I colored each with Copic markers and cut them out by hand. I popped up the frog with some foam adhesive and made a little spring out of paper so the bat would pop out and wiggle a bit. The background is black cardstock embossed with the Cobwebs Texture Fades by Sizzix. I was so pleased to be able to borrow the embossing folder from a friend while I was putting this card together! I then colored the web with my Wink of Stella pen for some sparkle (you know, the way a web would sparkle in the sun). For a closer look, some of the details are shown below.
I am entering this into the Friday Mashup Challenge this week for its Halloween theme. I’ve also been coloring along this month with Kathy’s coloring challenge at The Daily Marker: 30 Day Coloring Challenge. We try to color at least 10 minutes a day! Thanks for visiting today.


4 Comments | tags: cardmaking, copics, embossing, my favorite things, tim holtz | posted in Coloring, Friday Mashup, Halloween

- Stamps – Stampendous “Eek A Boo” and My Favorite Things “Witch Way is the Candy?”
- Patterned paper – Bella Blvd. “Color Chaos: Pickle Juice Strandz”
- Cardstock – Bazzill Basics and BoBunny “Boysenberry Dot”
- Dies – Spellbinder Nestabilities “Standard Circles Large”
- Copic markers
- Ribbon
‘Tis the season to begin creating all things Halloween! This card features a happy pumpkin with a mouse friend. I colored the stamped i mage with Copic markers and then layered papers to bring out the various colors in the image. This is also fits the challenge right now at Crafts Galore for a Halloween themed card. This card took me way longer than it should have to construct! I’ve been kind of in a creative slump lately and just not had time to complete a card, so it was a relief to get this put together! Thanks for visiting!
2 Comments | tags: cardmaking, copics, die cuts, stampendous | posted in Challenges, Halloween

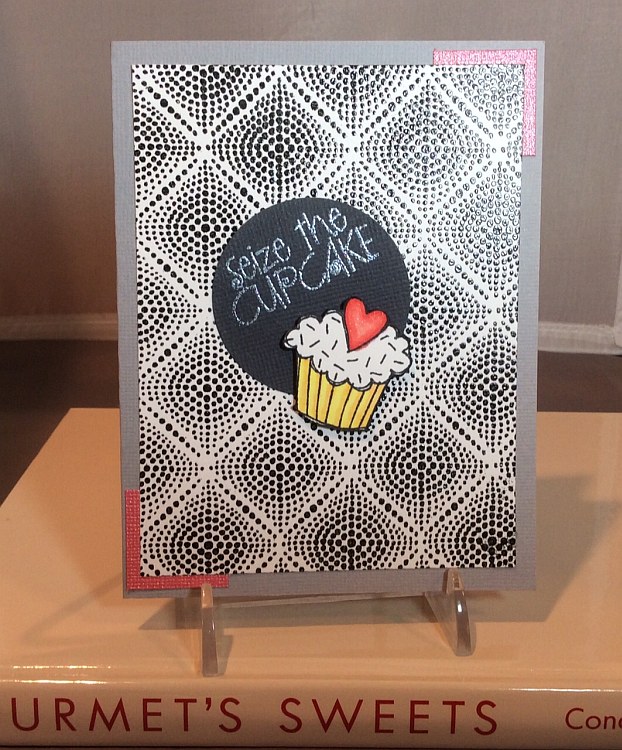
- Stamps – Hero Arts CL158 – “Cleardesign Cupcakes,” (both the cupcake and sentiment)
- Hero Arts CG648 – “Dotted Grid”
- Embossing Powder – Silver Pearl and Detail Black
- Cardstock – Neenah and Bazzill
- Copic markers to color cupcake
- Circle punch
I created this card for the Hero Arts Flickr Group‘s Scramble #119. We have 90 minutes to create a card for a suggested theme. The theme this time was black, white, grey and a pop of color. I embossed the background stamp with detail black embossing powder. I then stamped and colored the cupcake with Copics and cut it out. I decided to use grey cardstock for the card base and popped a little bit of color in the corners to bring out the pale red of the heart. I heat embossed the sentiment on a circle of dark grey cardstock and popped up the cupcake on top of it. Thanks for stopping by!
Leave a comment | tags: cardmaking, embossing, Hero Arts, stamping | posted in Birthday

- Dies – Simon Says Stamp “Stitched Daisies” and “Thanks” (from Stamptember 2015 and 2014, respectively!)
- Ranger Distress Inks – Salty Ocean, Tumbled Glass, and Chipped Sapphire
- White Heavyweight Vellum – Paper Accents
- Cardstock – Bazzill Dotted Swiss – Deep Blue and Paper Accents – Blue Odyssey
- Punch – Marvy 1″ circle
I started out by creating a background for this card. I decided I would work with blues so I could participate in the current Addicted to CAS challenge #71: Code Word Blue. I used the “ink smooshing” technique I first learned from Kristina Werner, with Ranger Distress inks. I wanted to get some good contrast of tone and value as I smooshed the ink around. I die cut the daisies from heavyweight vellum to show off the “stitching” that is embossed on the petals. I wanted to showcase the daisies a bit more, so I added small punched white circles behind each and then repeated the circles in vellum to accent the sentiment. This isolated them from the busy background a little bit. I also applied a little Chipped Sapphire ink to the sentiment so that it stood out just a little bit more. I adhered the piece to a top-folding card and finished it all off with some Wink of Stella sparkle on the daisies. Thanks for visiting.
4 Comments | tags: cardmaking, die cuts, distress techniques, flora, Simon Says Stamp, stamptember | posted in Addicted to CAS, Challenges, Distress Techniques, Thank You

- Stamps –
- Ranger/Dina Wakley Media “Scribbly Birds”
- Printworks “Thank You”
- Patterned papers – KaiserCraft “Outdoor Trail” 6-1/2″ paper pad
- Ranger Distress inks – Squeezed Lemonade, Bundled Sage and Dried Marigold
- Wood button – Prima Marketing
- Enamel dots – Teresa Collins – Orange
- Twine – Little B – Naturals
- Cardstock – Bazzill
- Kraft paper
I created this card with one of the cute bird images by Dina Wakley. First I applied Ranger Distress inks to the paper, blending the three colors in a somewhat random manner. Then I stamped the image onto the inked cardstock and cut it out. This background paper is spot varnished, so it has a real sheen to it (I think you can see it in the photo). I used the current challenge sketch at Retro Sketches (#179) and also will enter this in the Shopping Our Stash #217: Put a Bird on it! Using inspiration from the sketch to put this card together was pretty fun. Thanks for visiting today.
2 Comments | tags: cardmaking, Dina Wakley, distress techniques, KaiserCraft, Ranger, stamping | posted in Challenges, Distress Techniques, Retro Sketches, Shopping Our Stash, Thank You